Kitchen Remodeling
Remodeling Kitchen Reveal
The Before
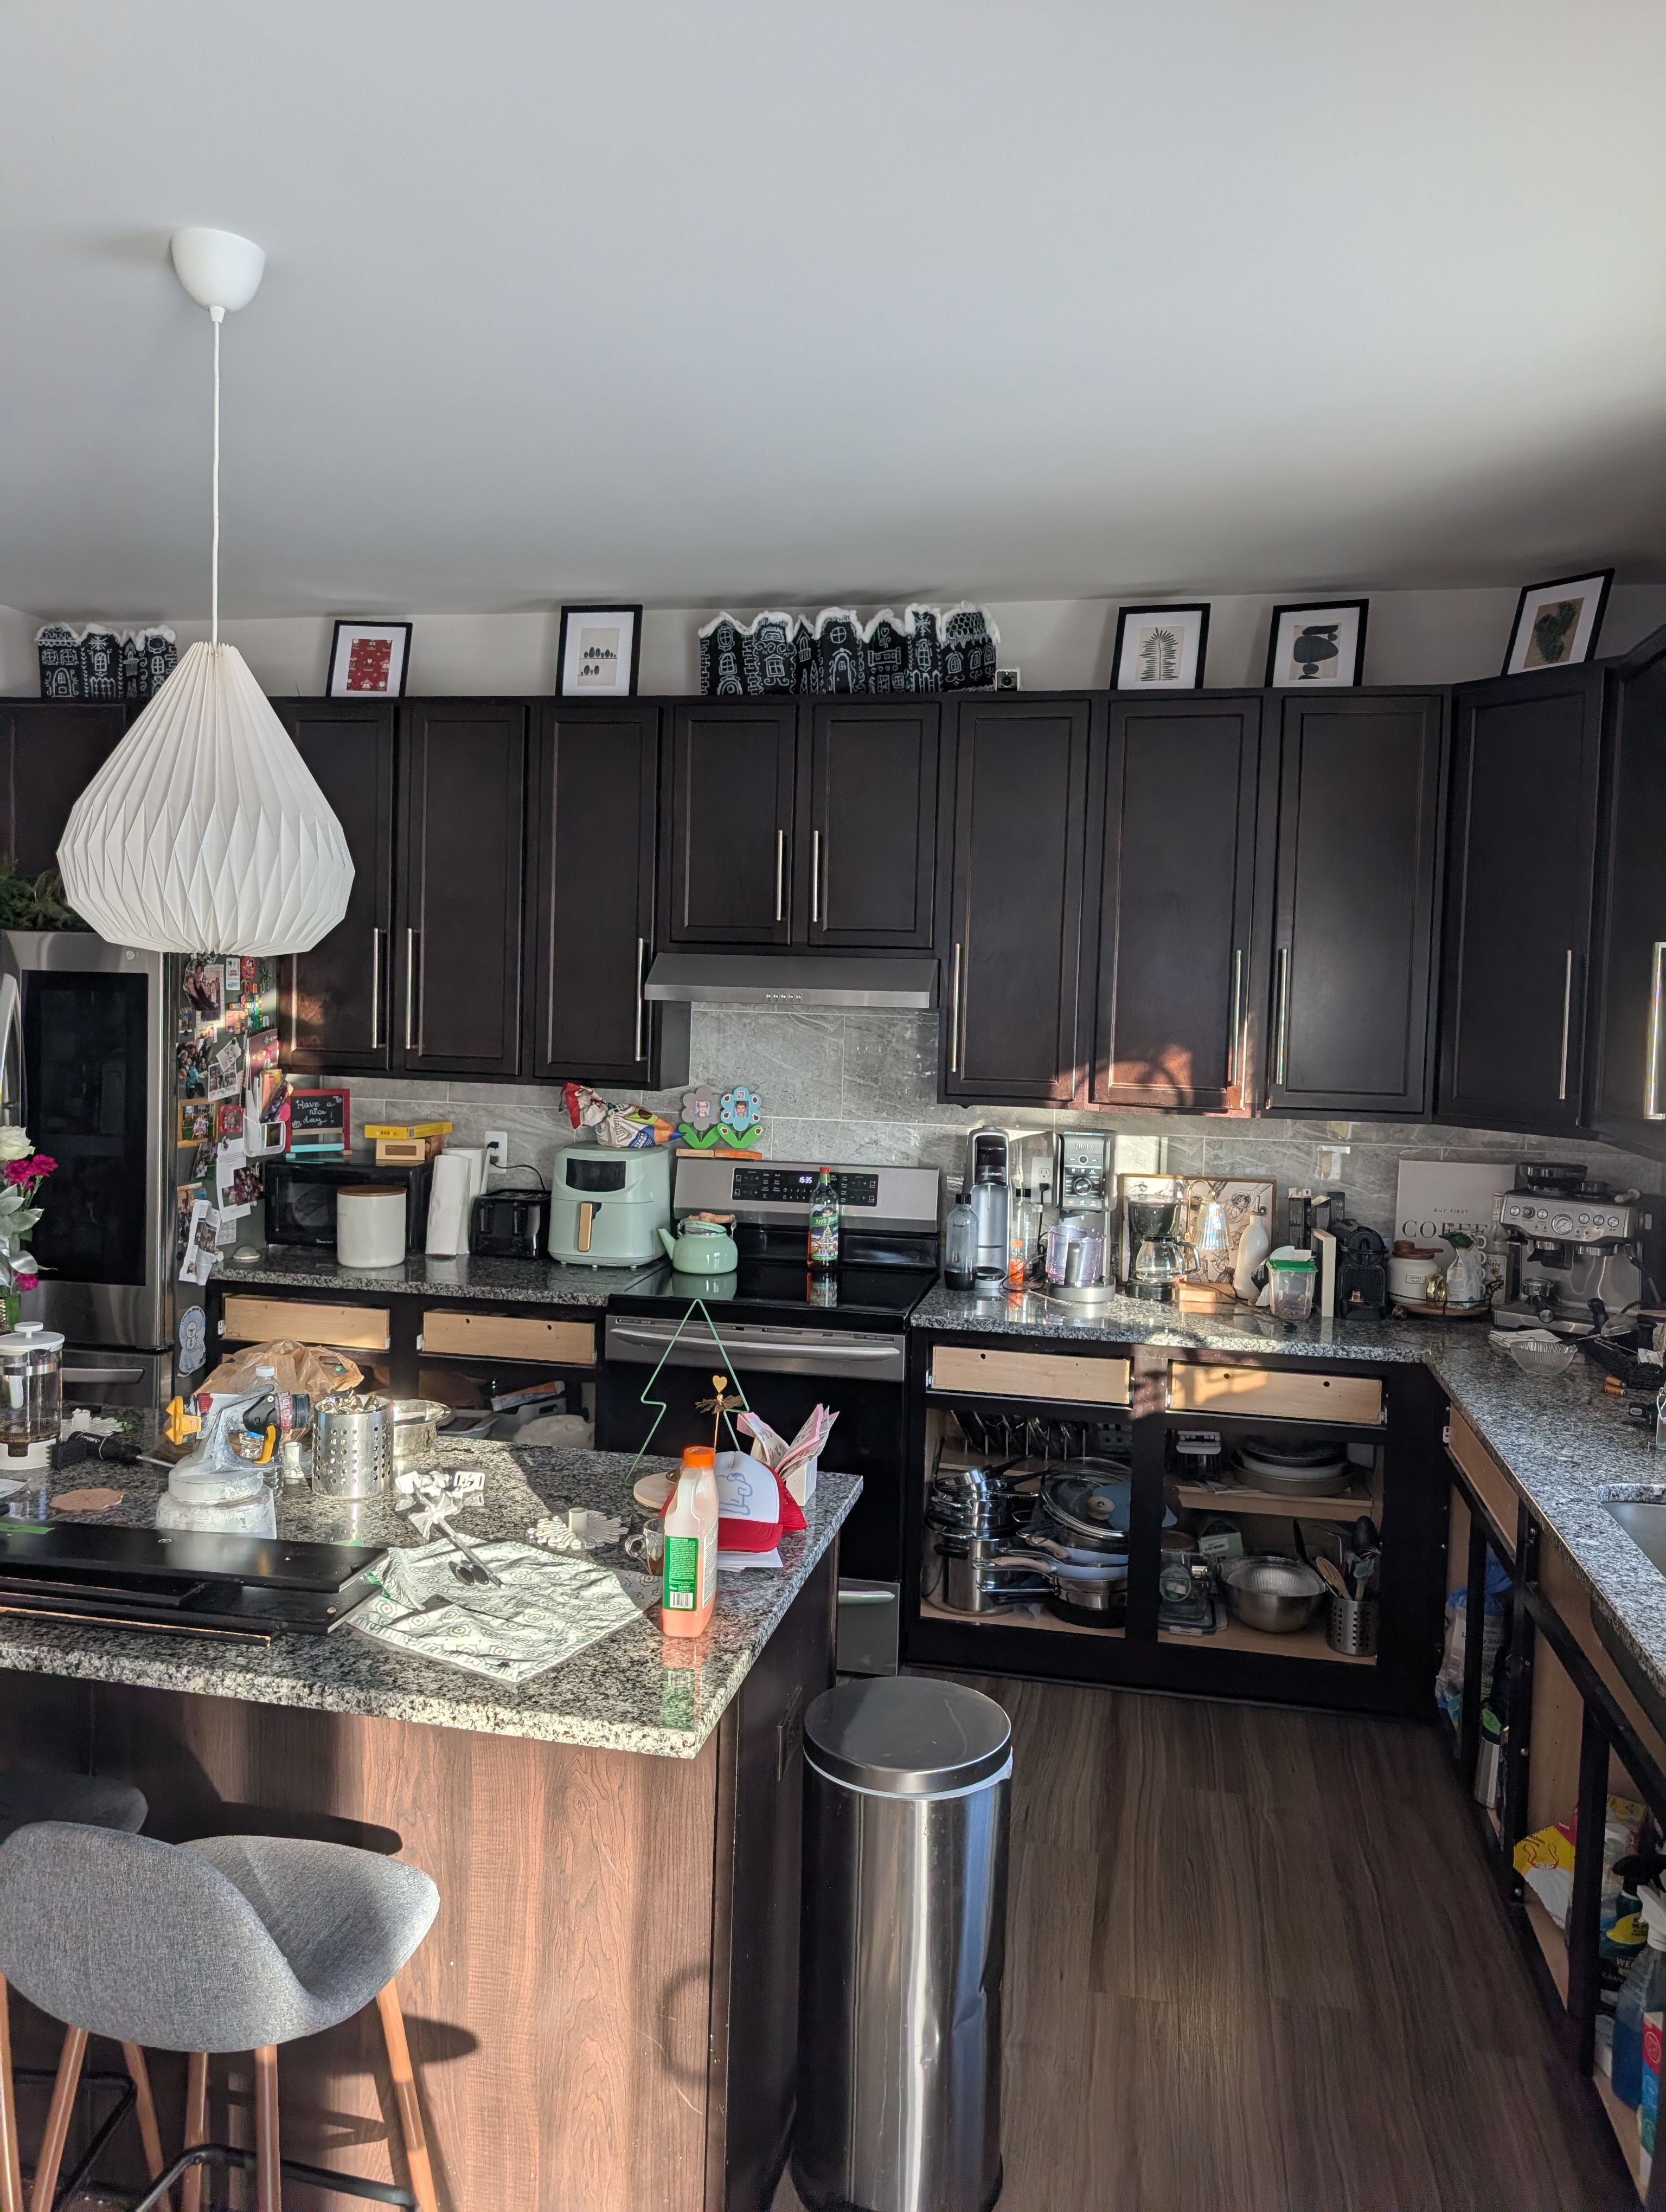
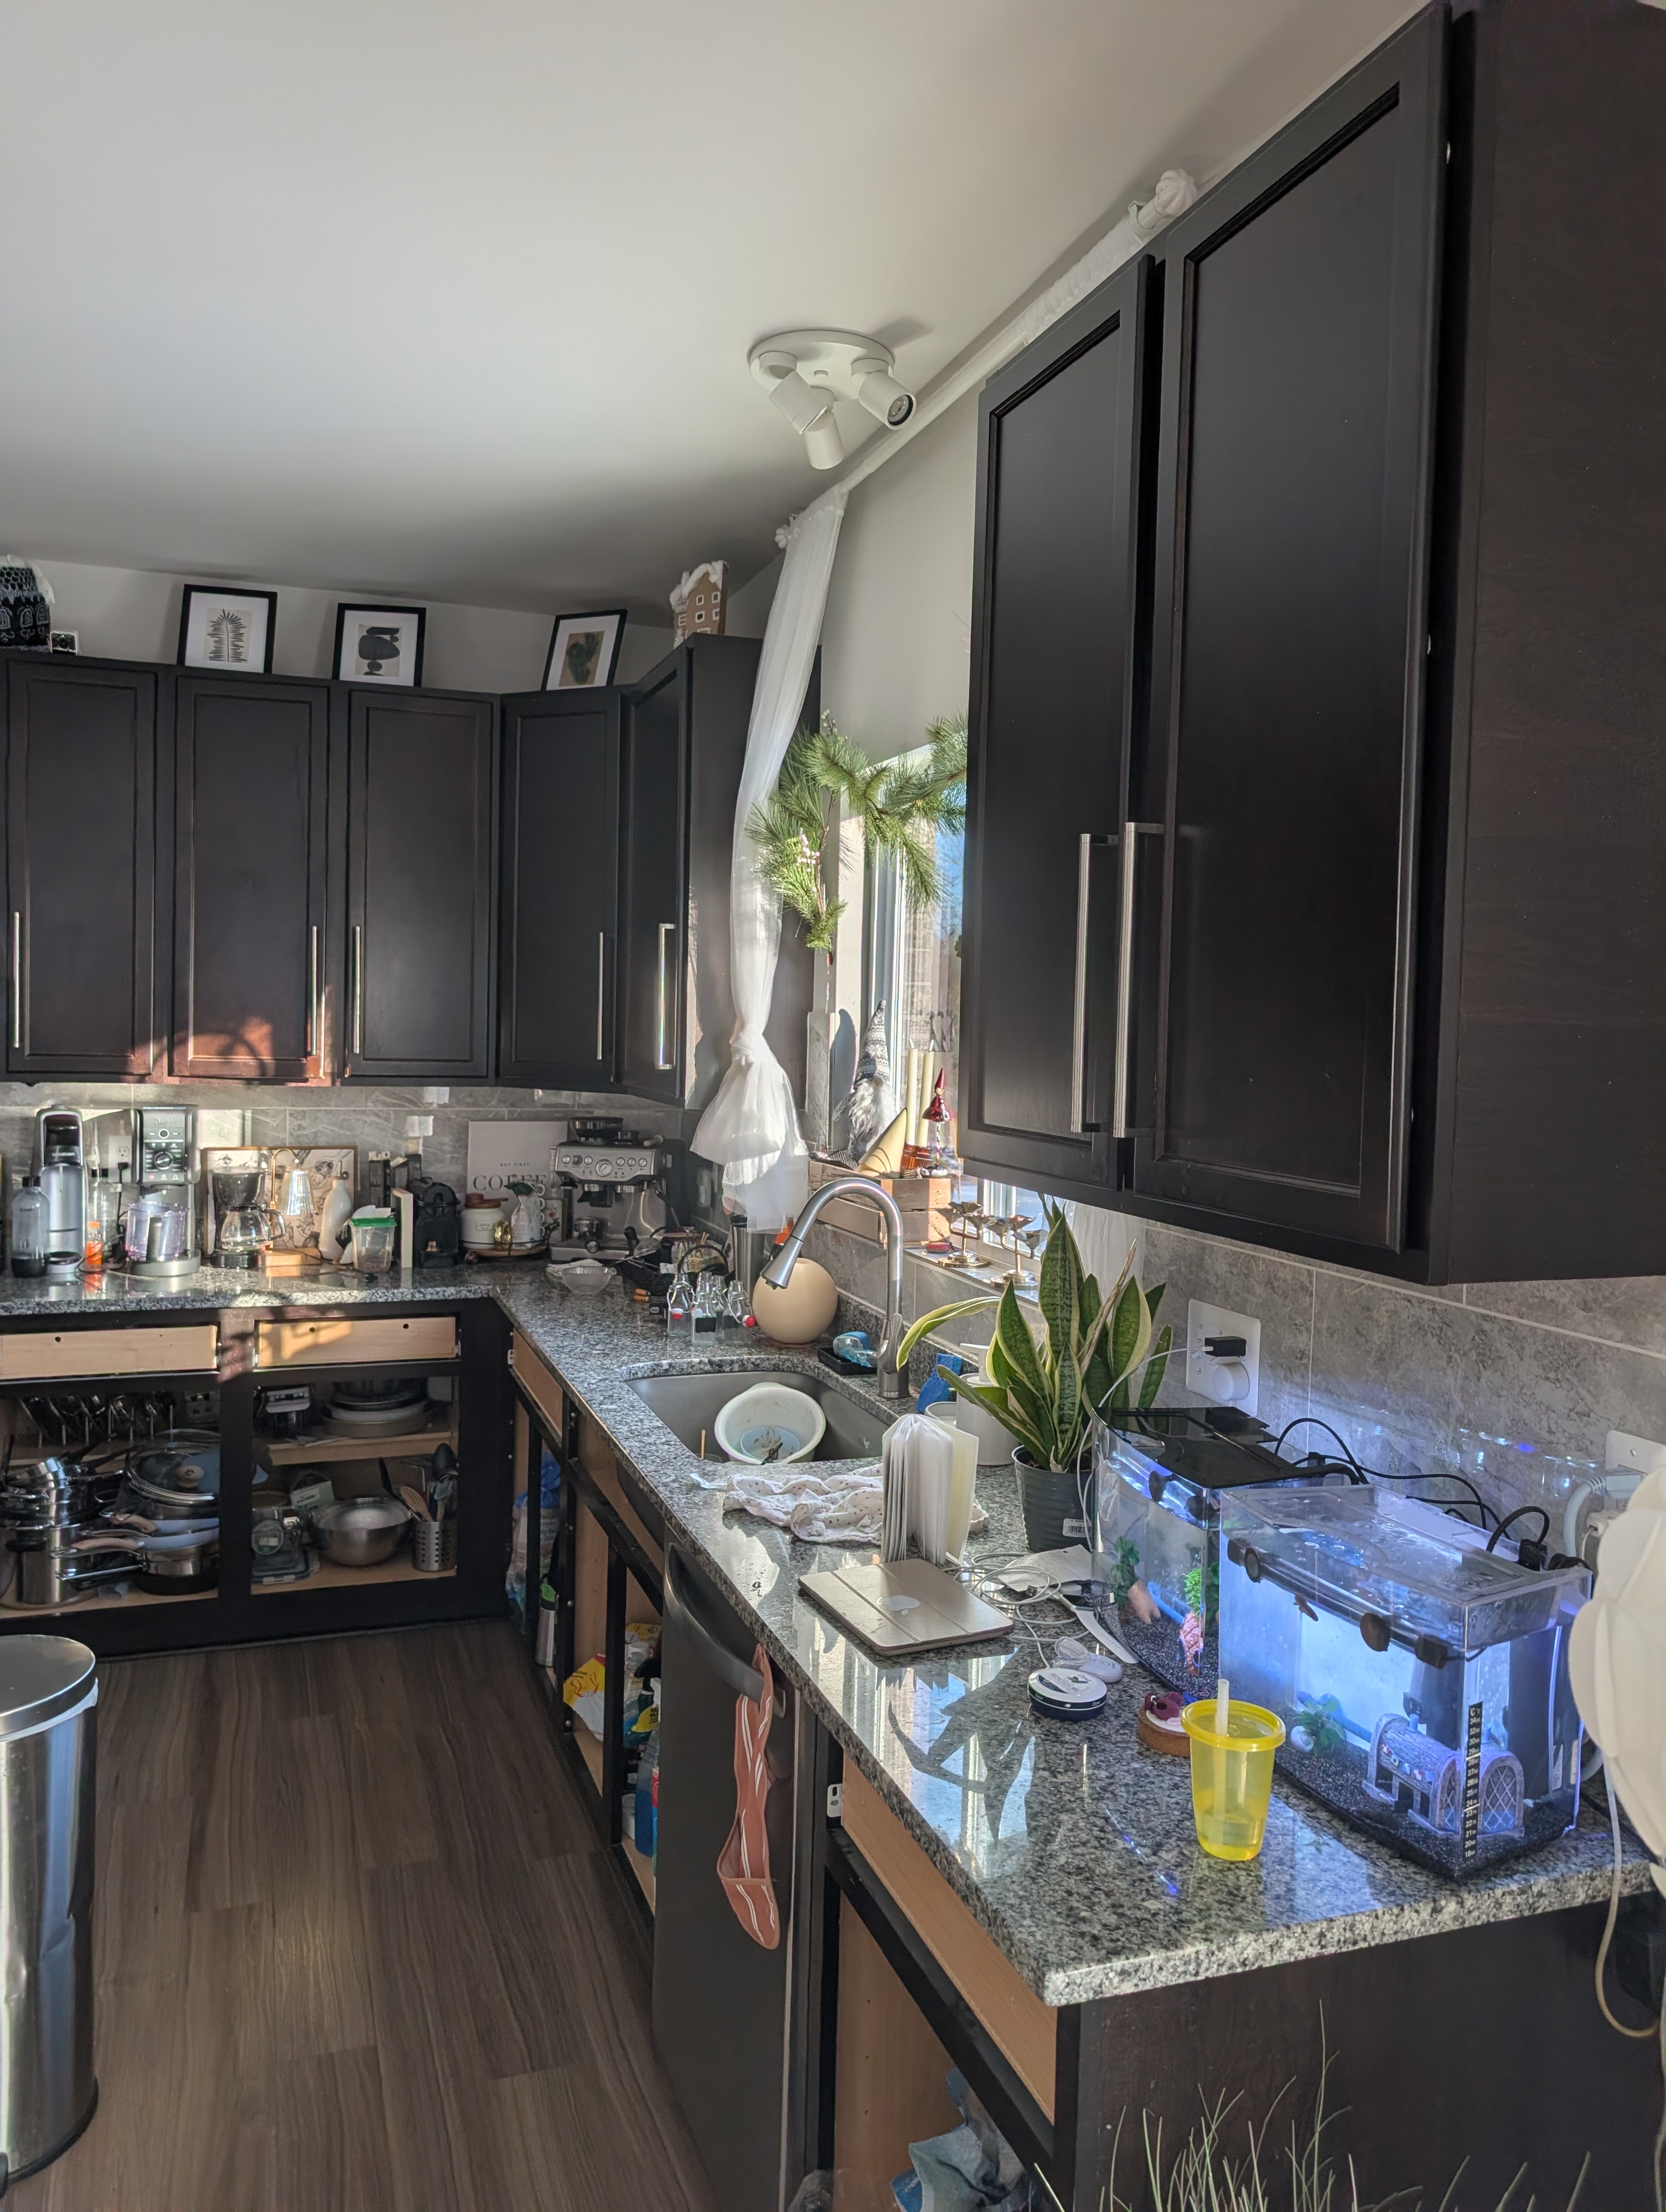
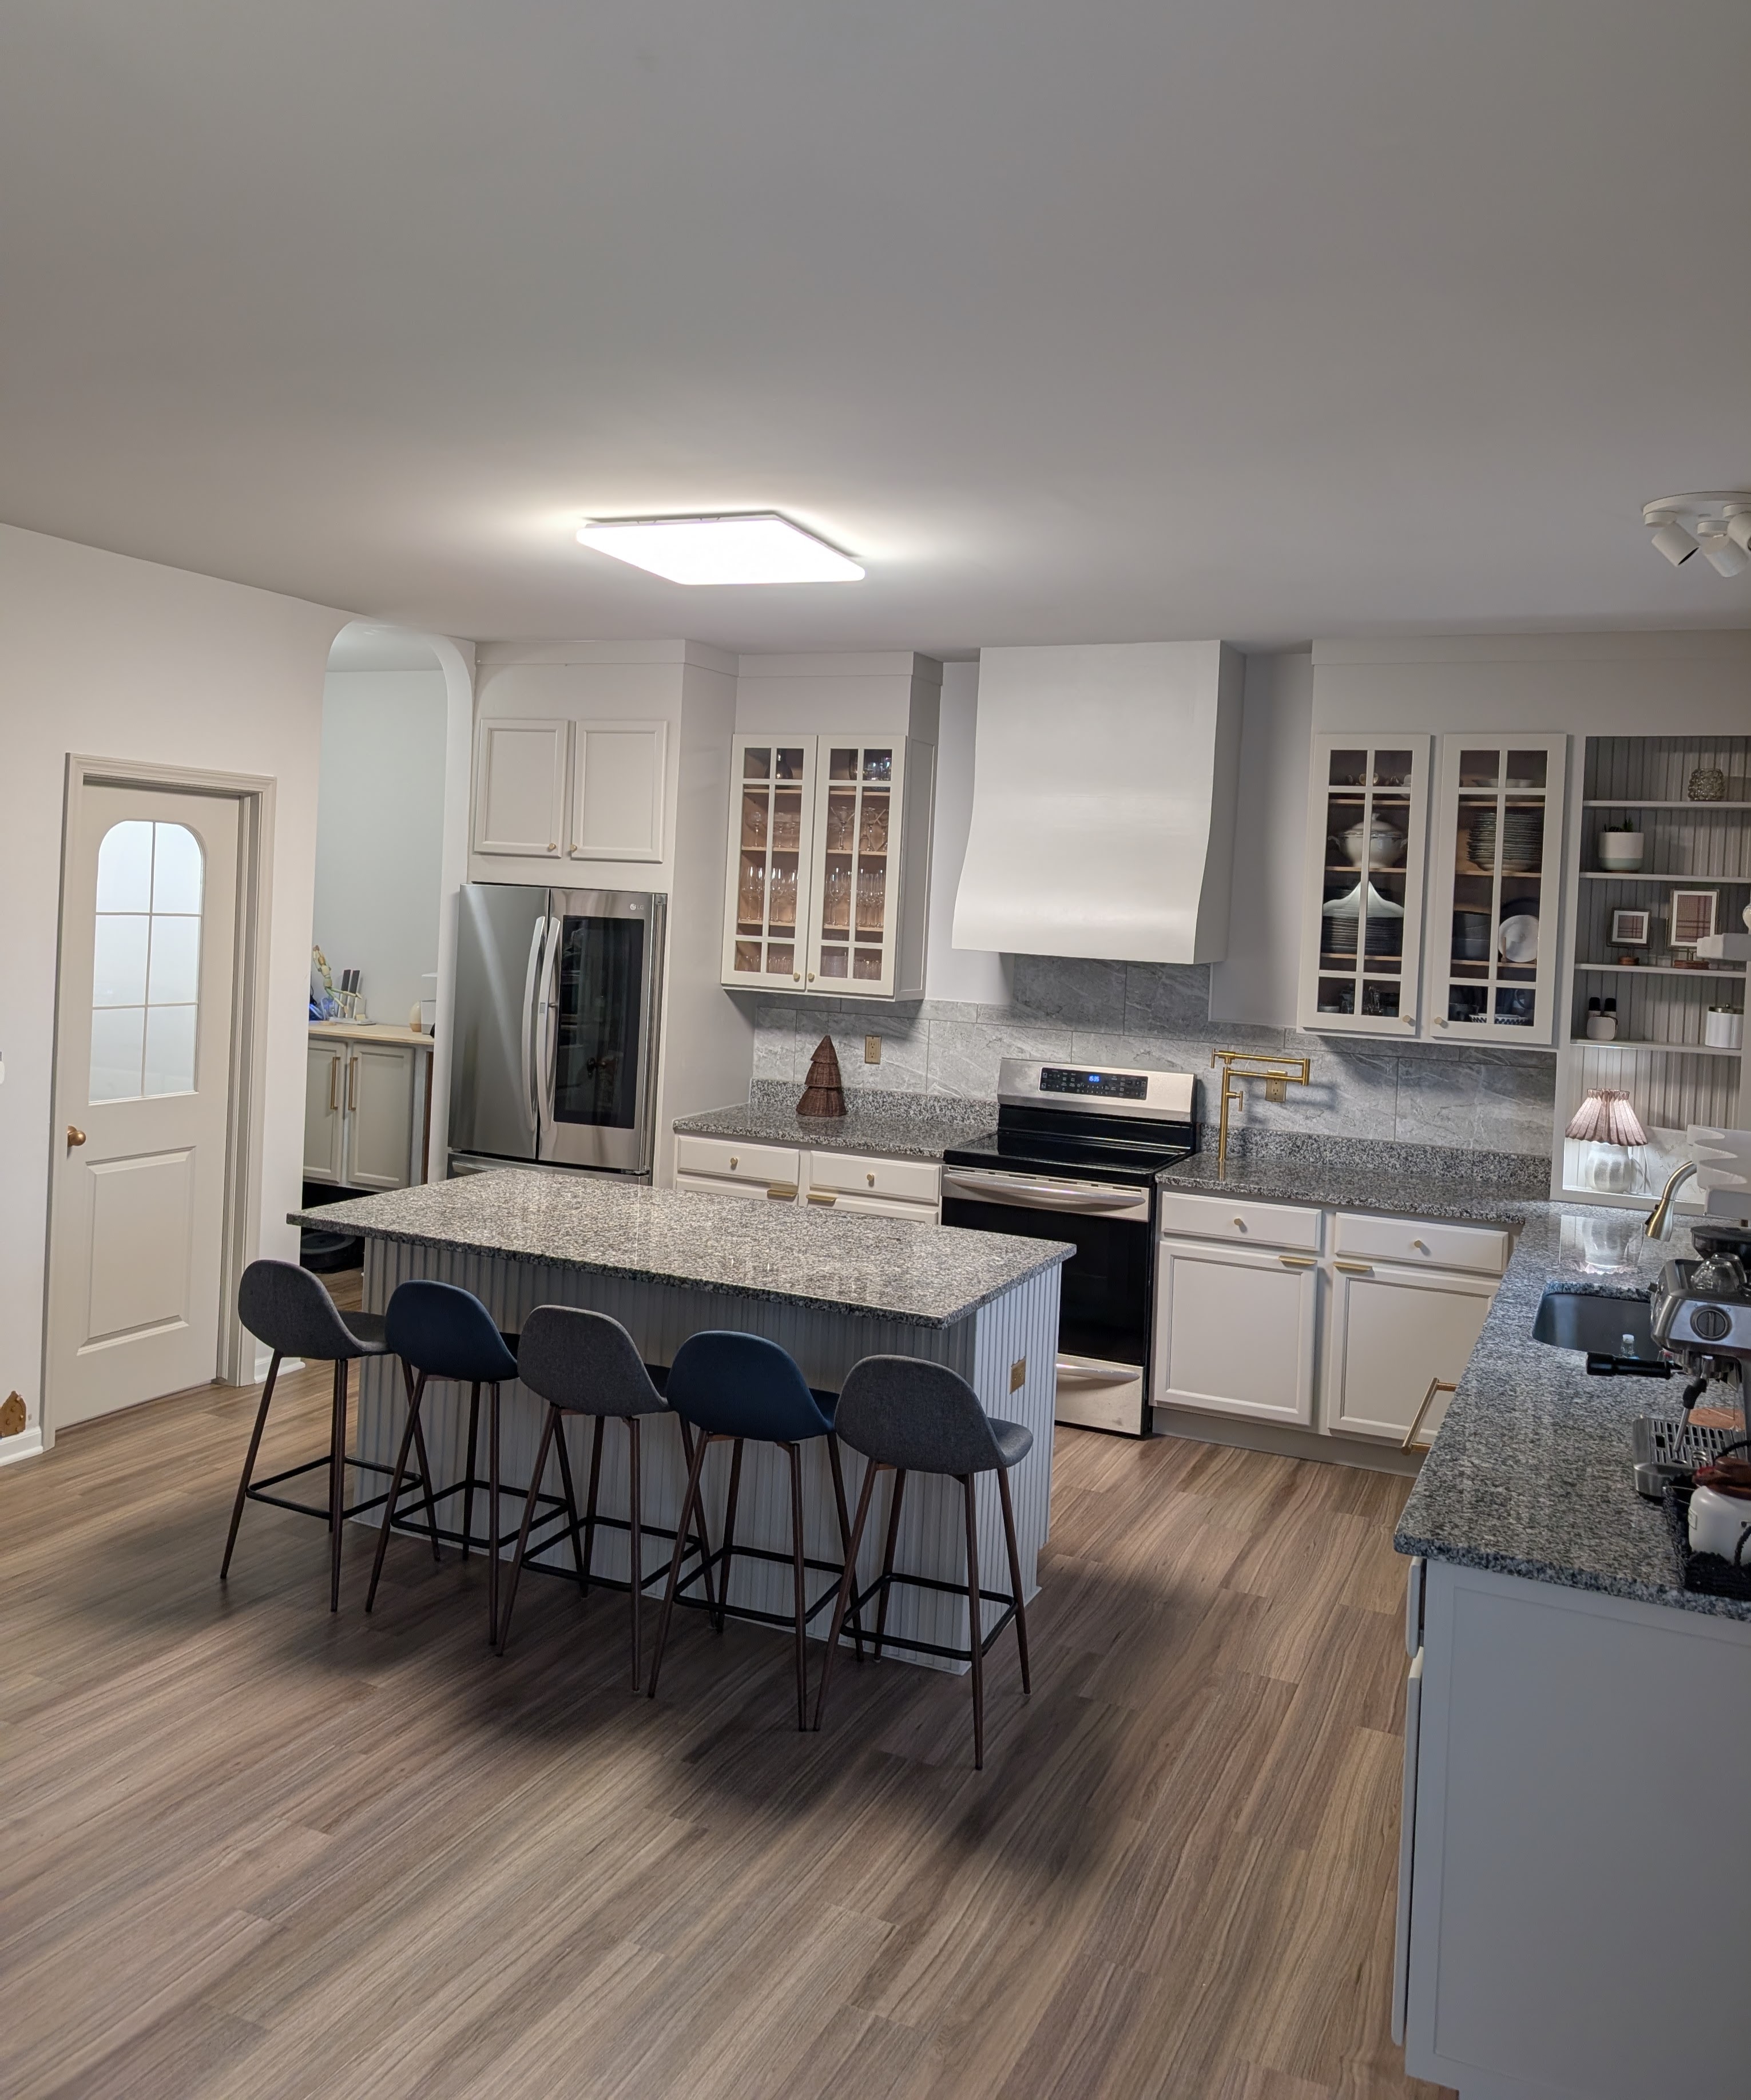
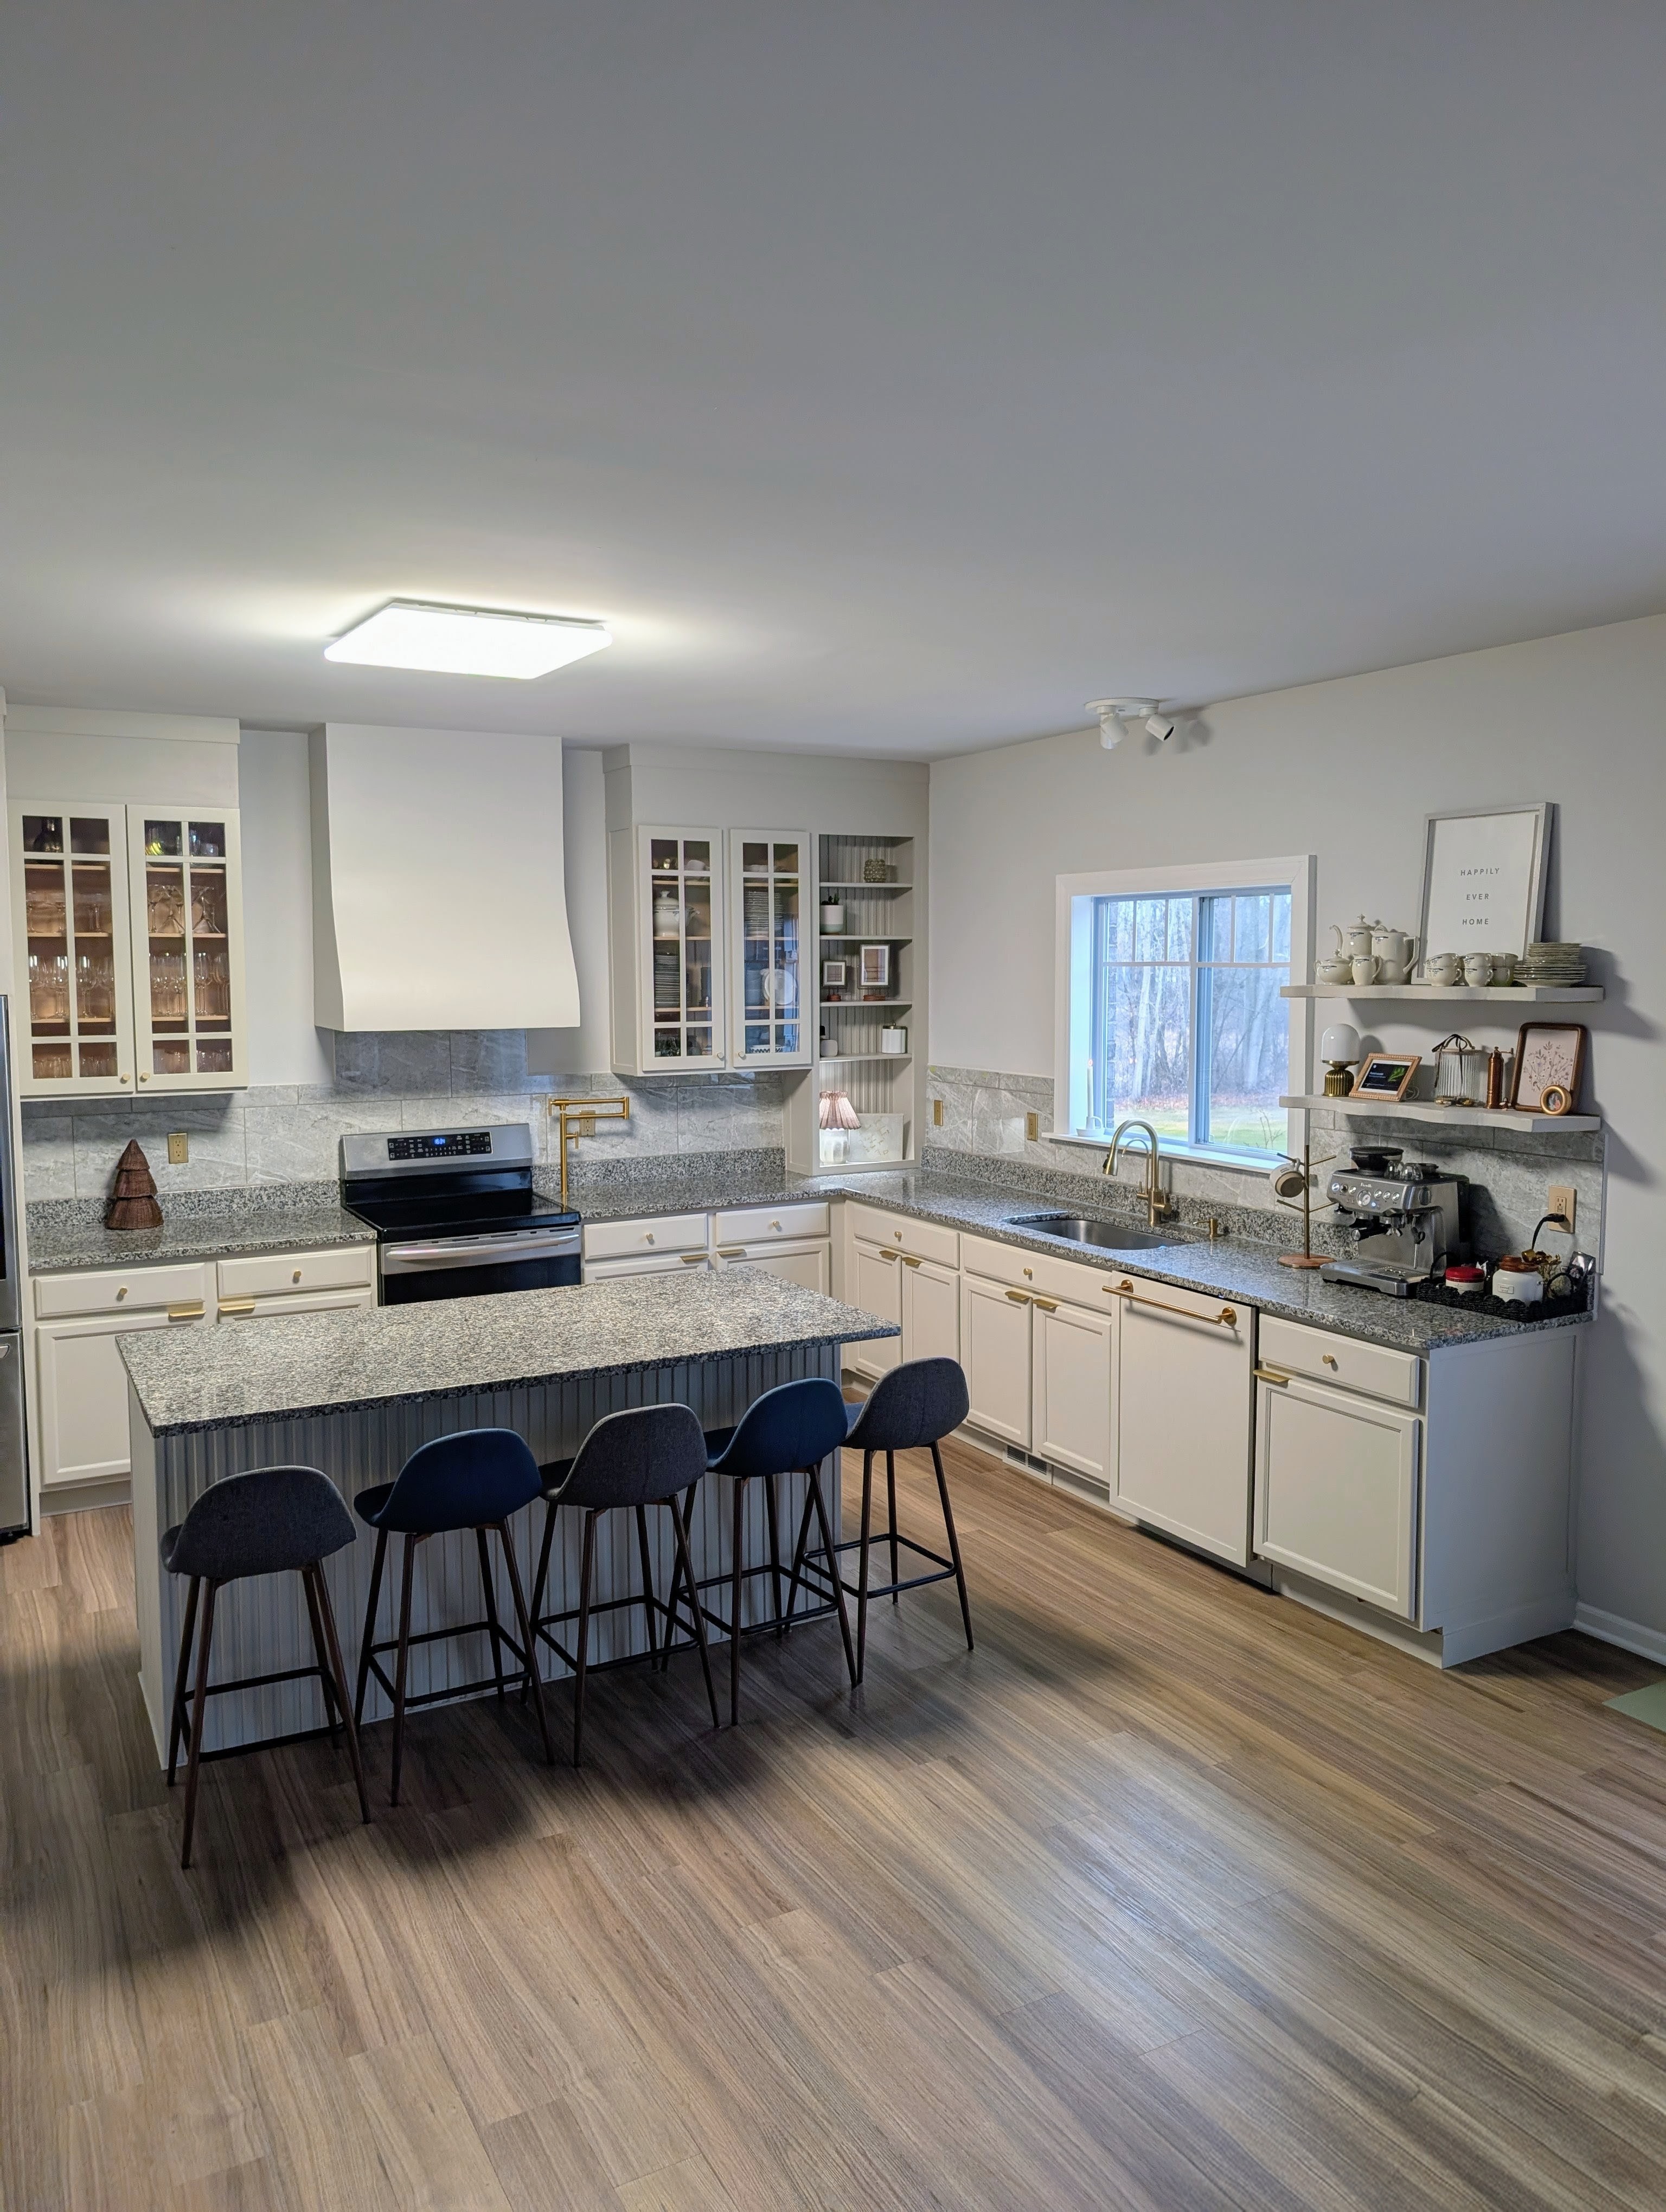
Here’s a glimpse of what this space looked like before and now it feels almost unrecognizable. There were obvious things that weren’t working in here like dark cabinets lined up in one long row that were far out of reach with 10ft ceiling height, free standing garbage bin by the kitchen island, no filtered water or a pot filler, all that and more were not convenient neither appealing.
A special applause goes to my favorite paint by Benjamin Moore. It is one of the most famous "greige" paint colors out there because of its incredible versatility, and if you are like me searching for the right greige paint search no more as you found it in Benjamin Moore.
As a Tip: Here is the alternative way in case you work with a lower budget as Benjamin Moore can be pricey, just take the name of the paint (see resources below) and let it be mixed with a different brand. Imagine you've found "the one," make sure to check it against your floor's undertones. Though the greige I chose should look perfect against oak and walnut , and might look totally different against dark walnut or gray-washed planks. So lay the sample against the cabinet on the floor and see if you like it)
You name it, this change does it. Kitchen is by far the busiest, hardest working space in our home where meals are prepped, homework is done, board games are played and the guests are served. It took long time to get here, but I could not be happier with how this space turned out! I can proudly call it my dream kitchen!
Casing the Fridge
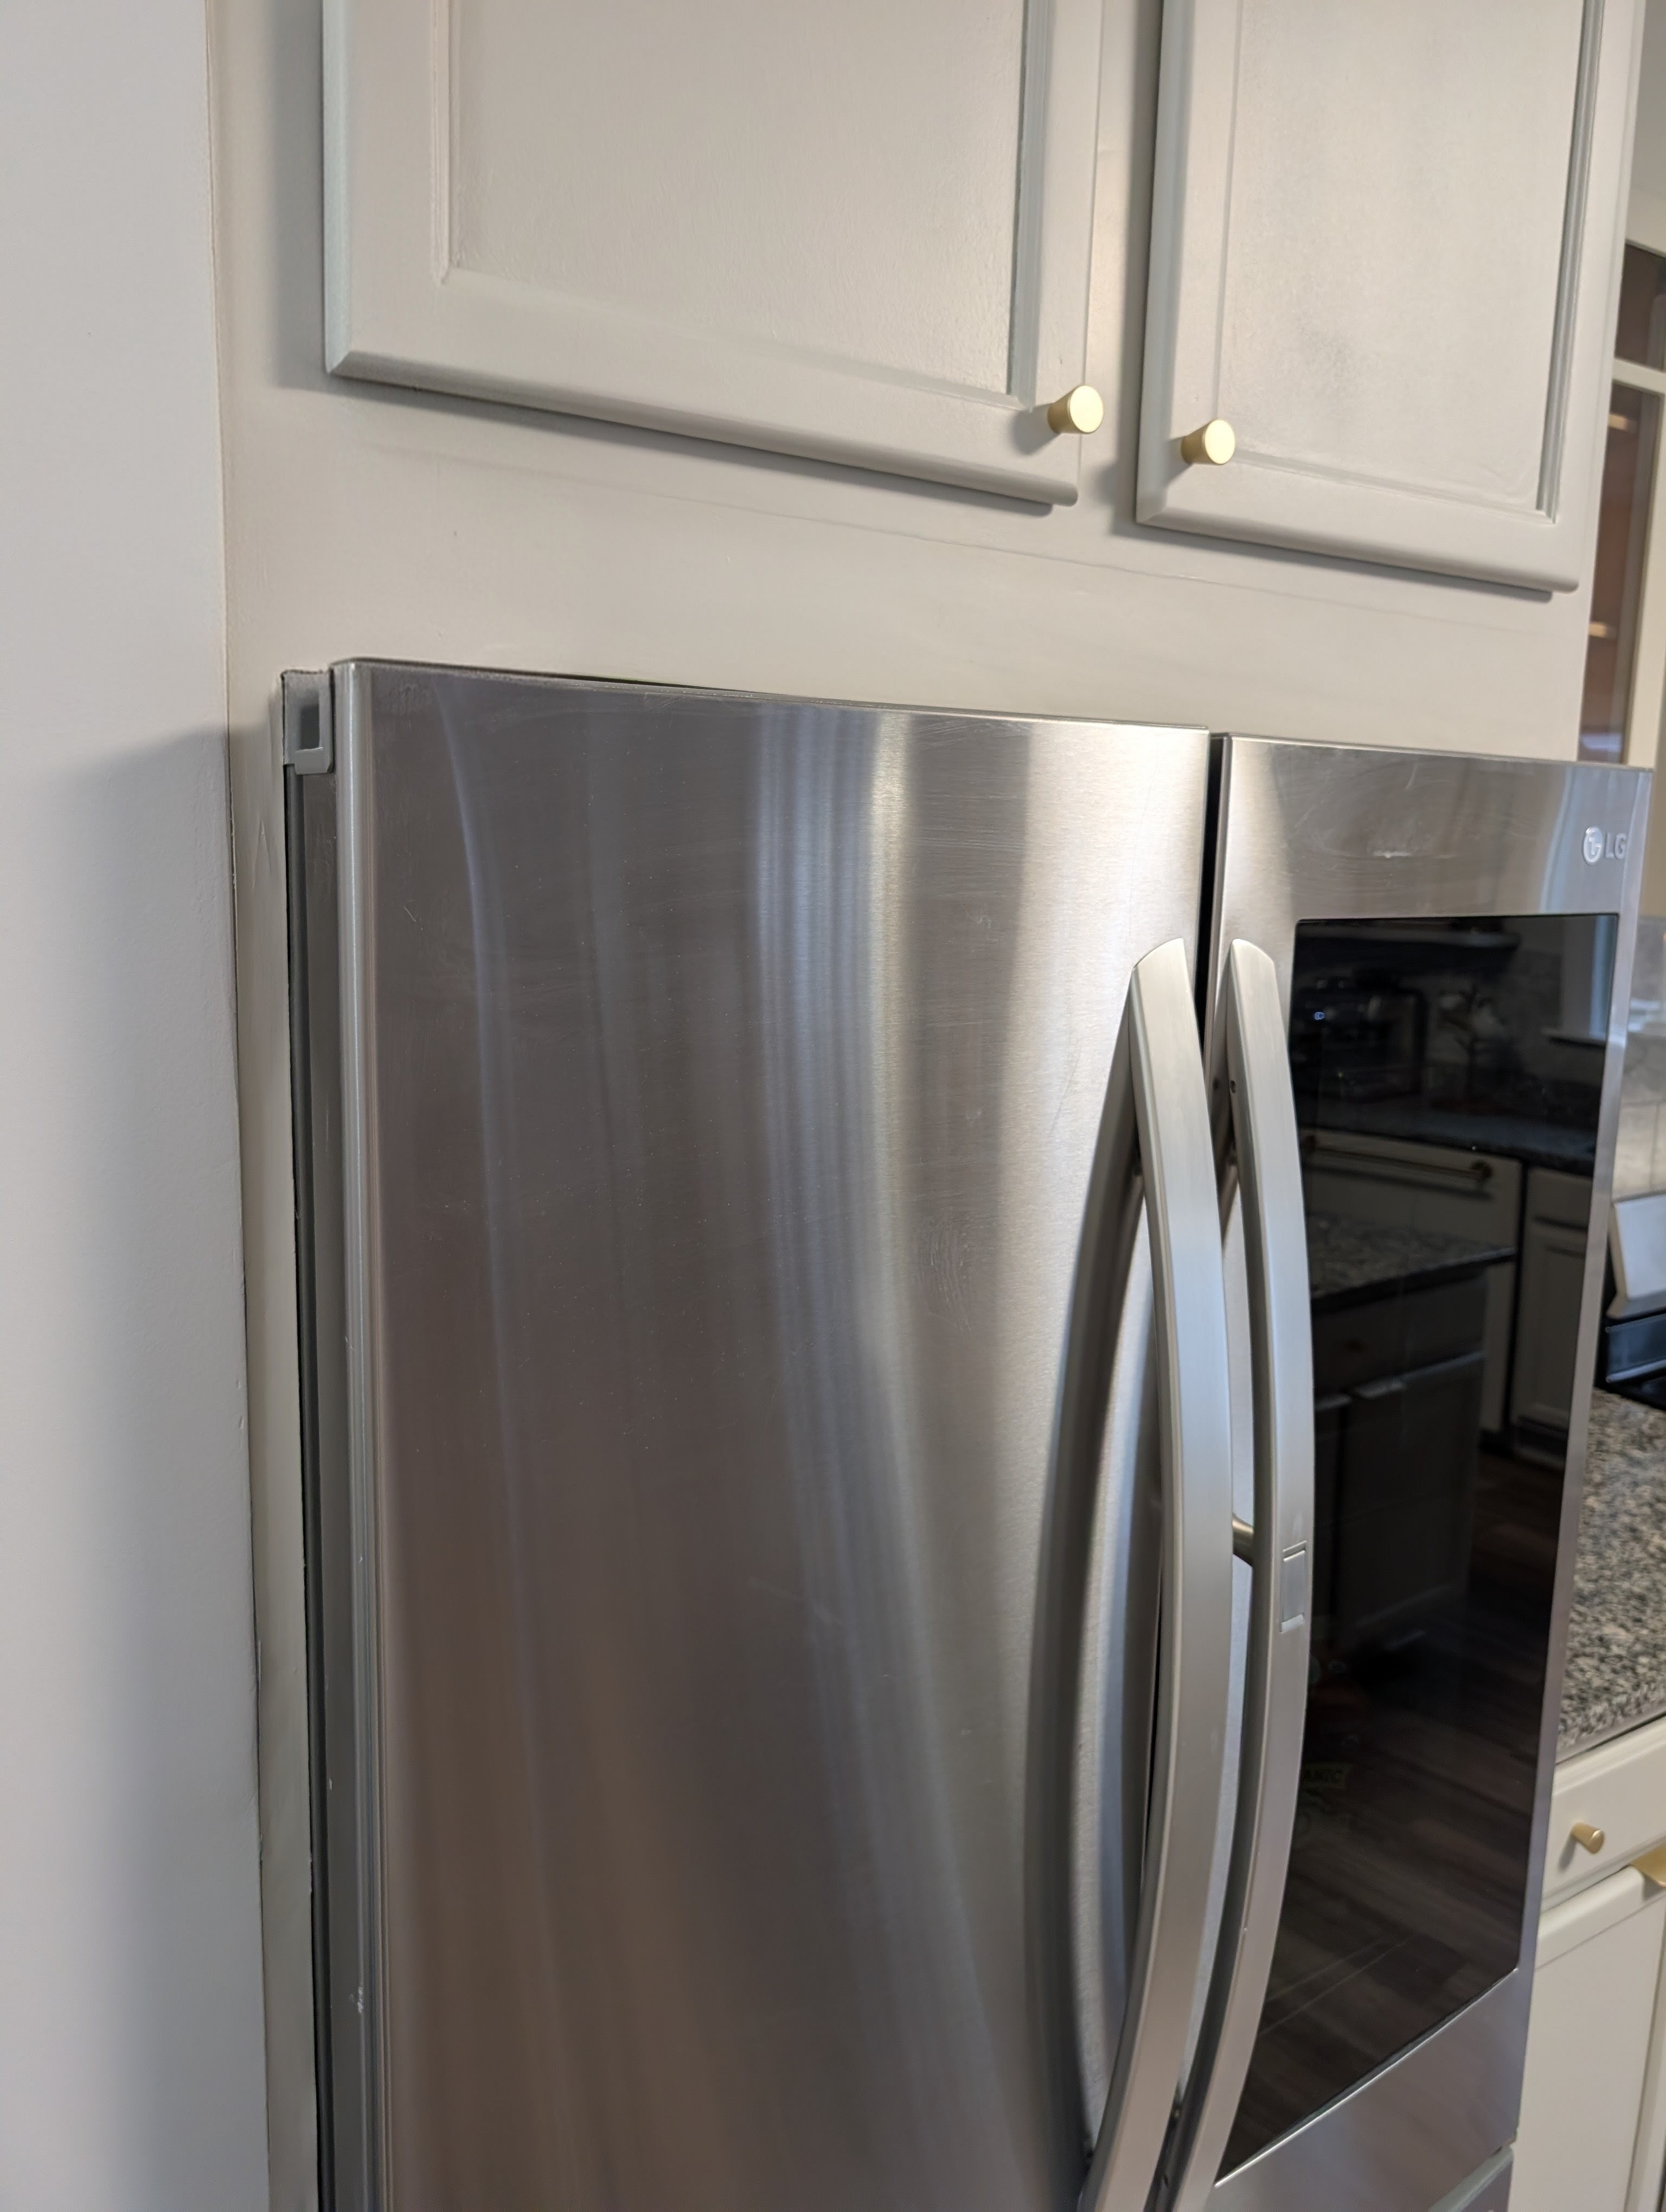
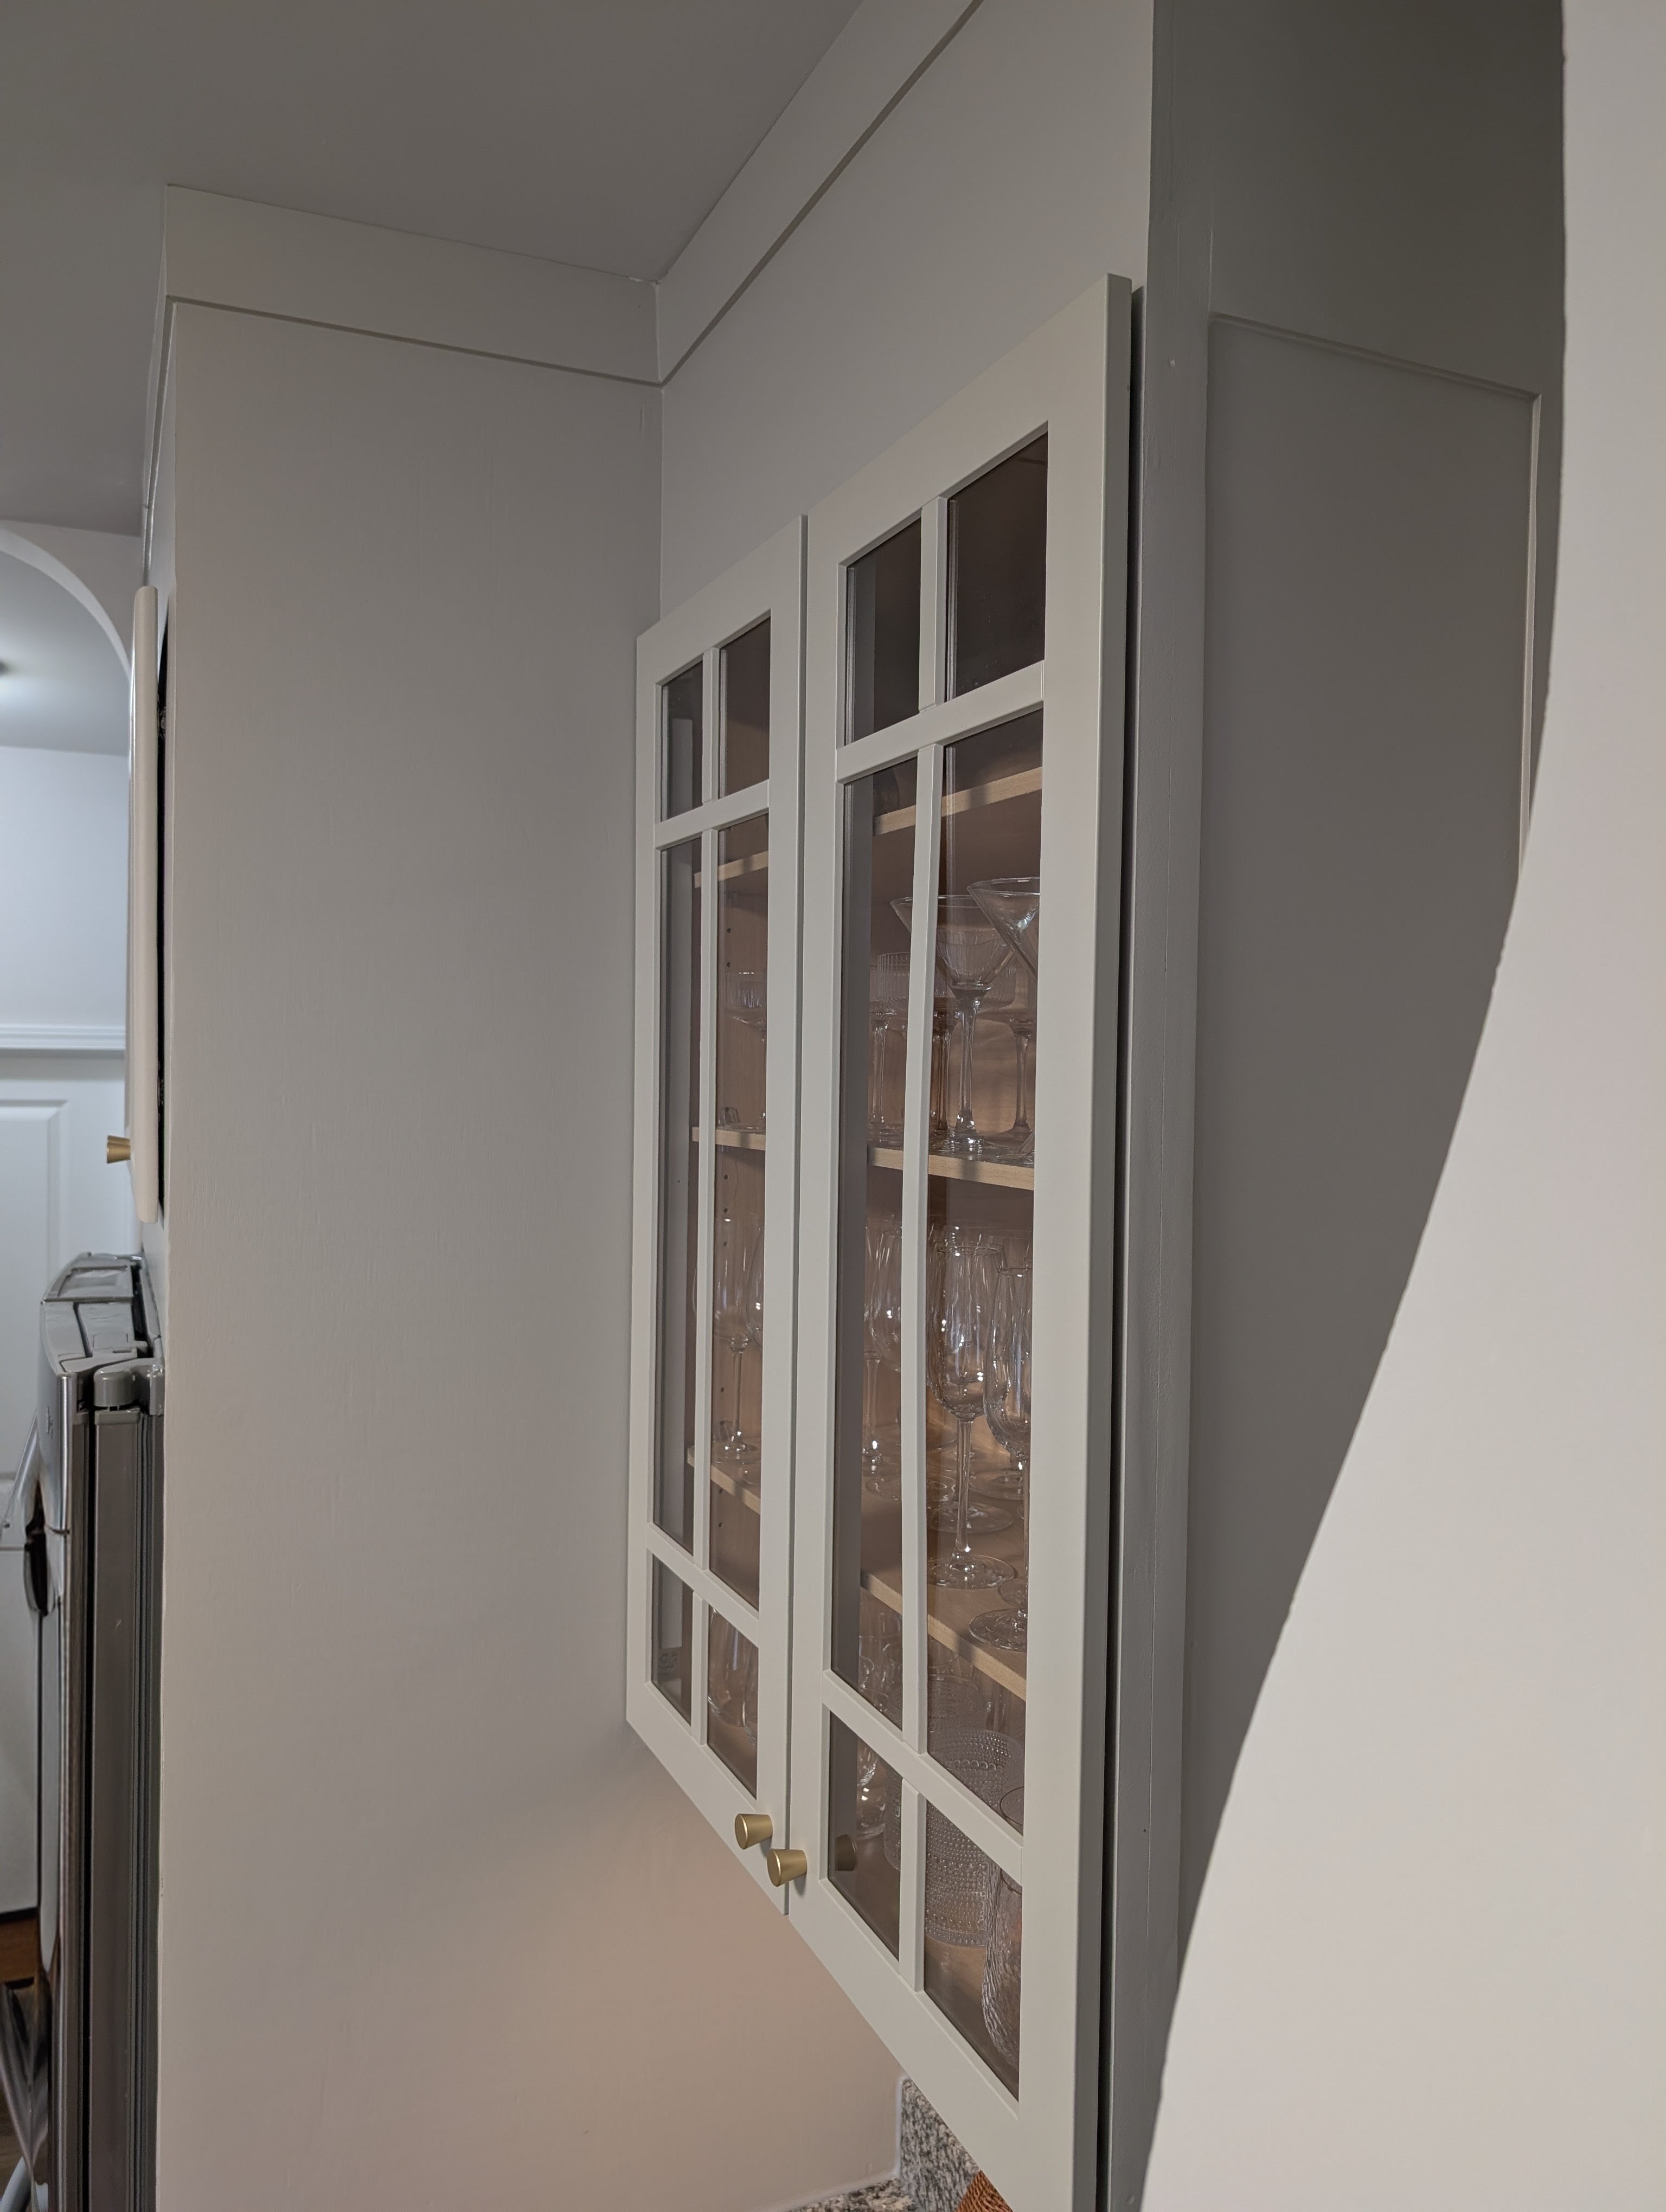
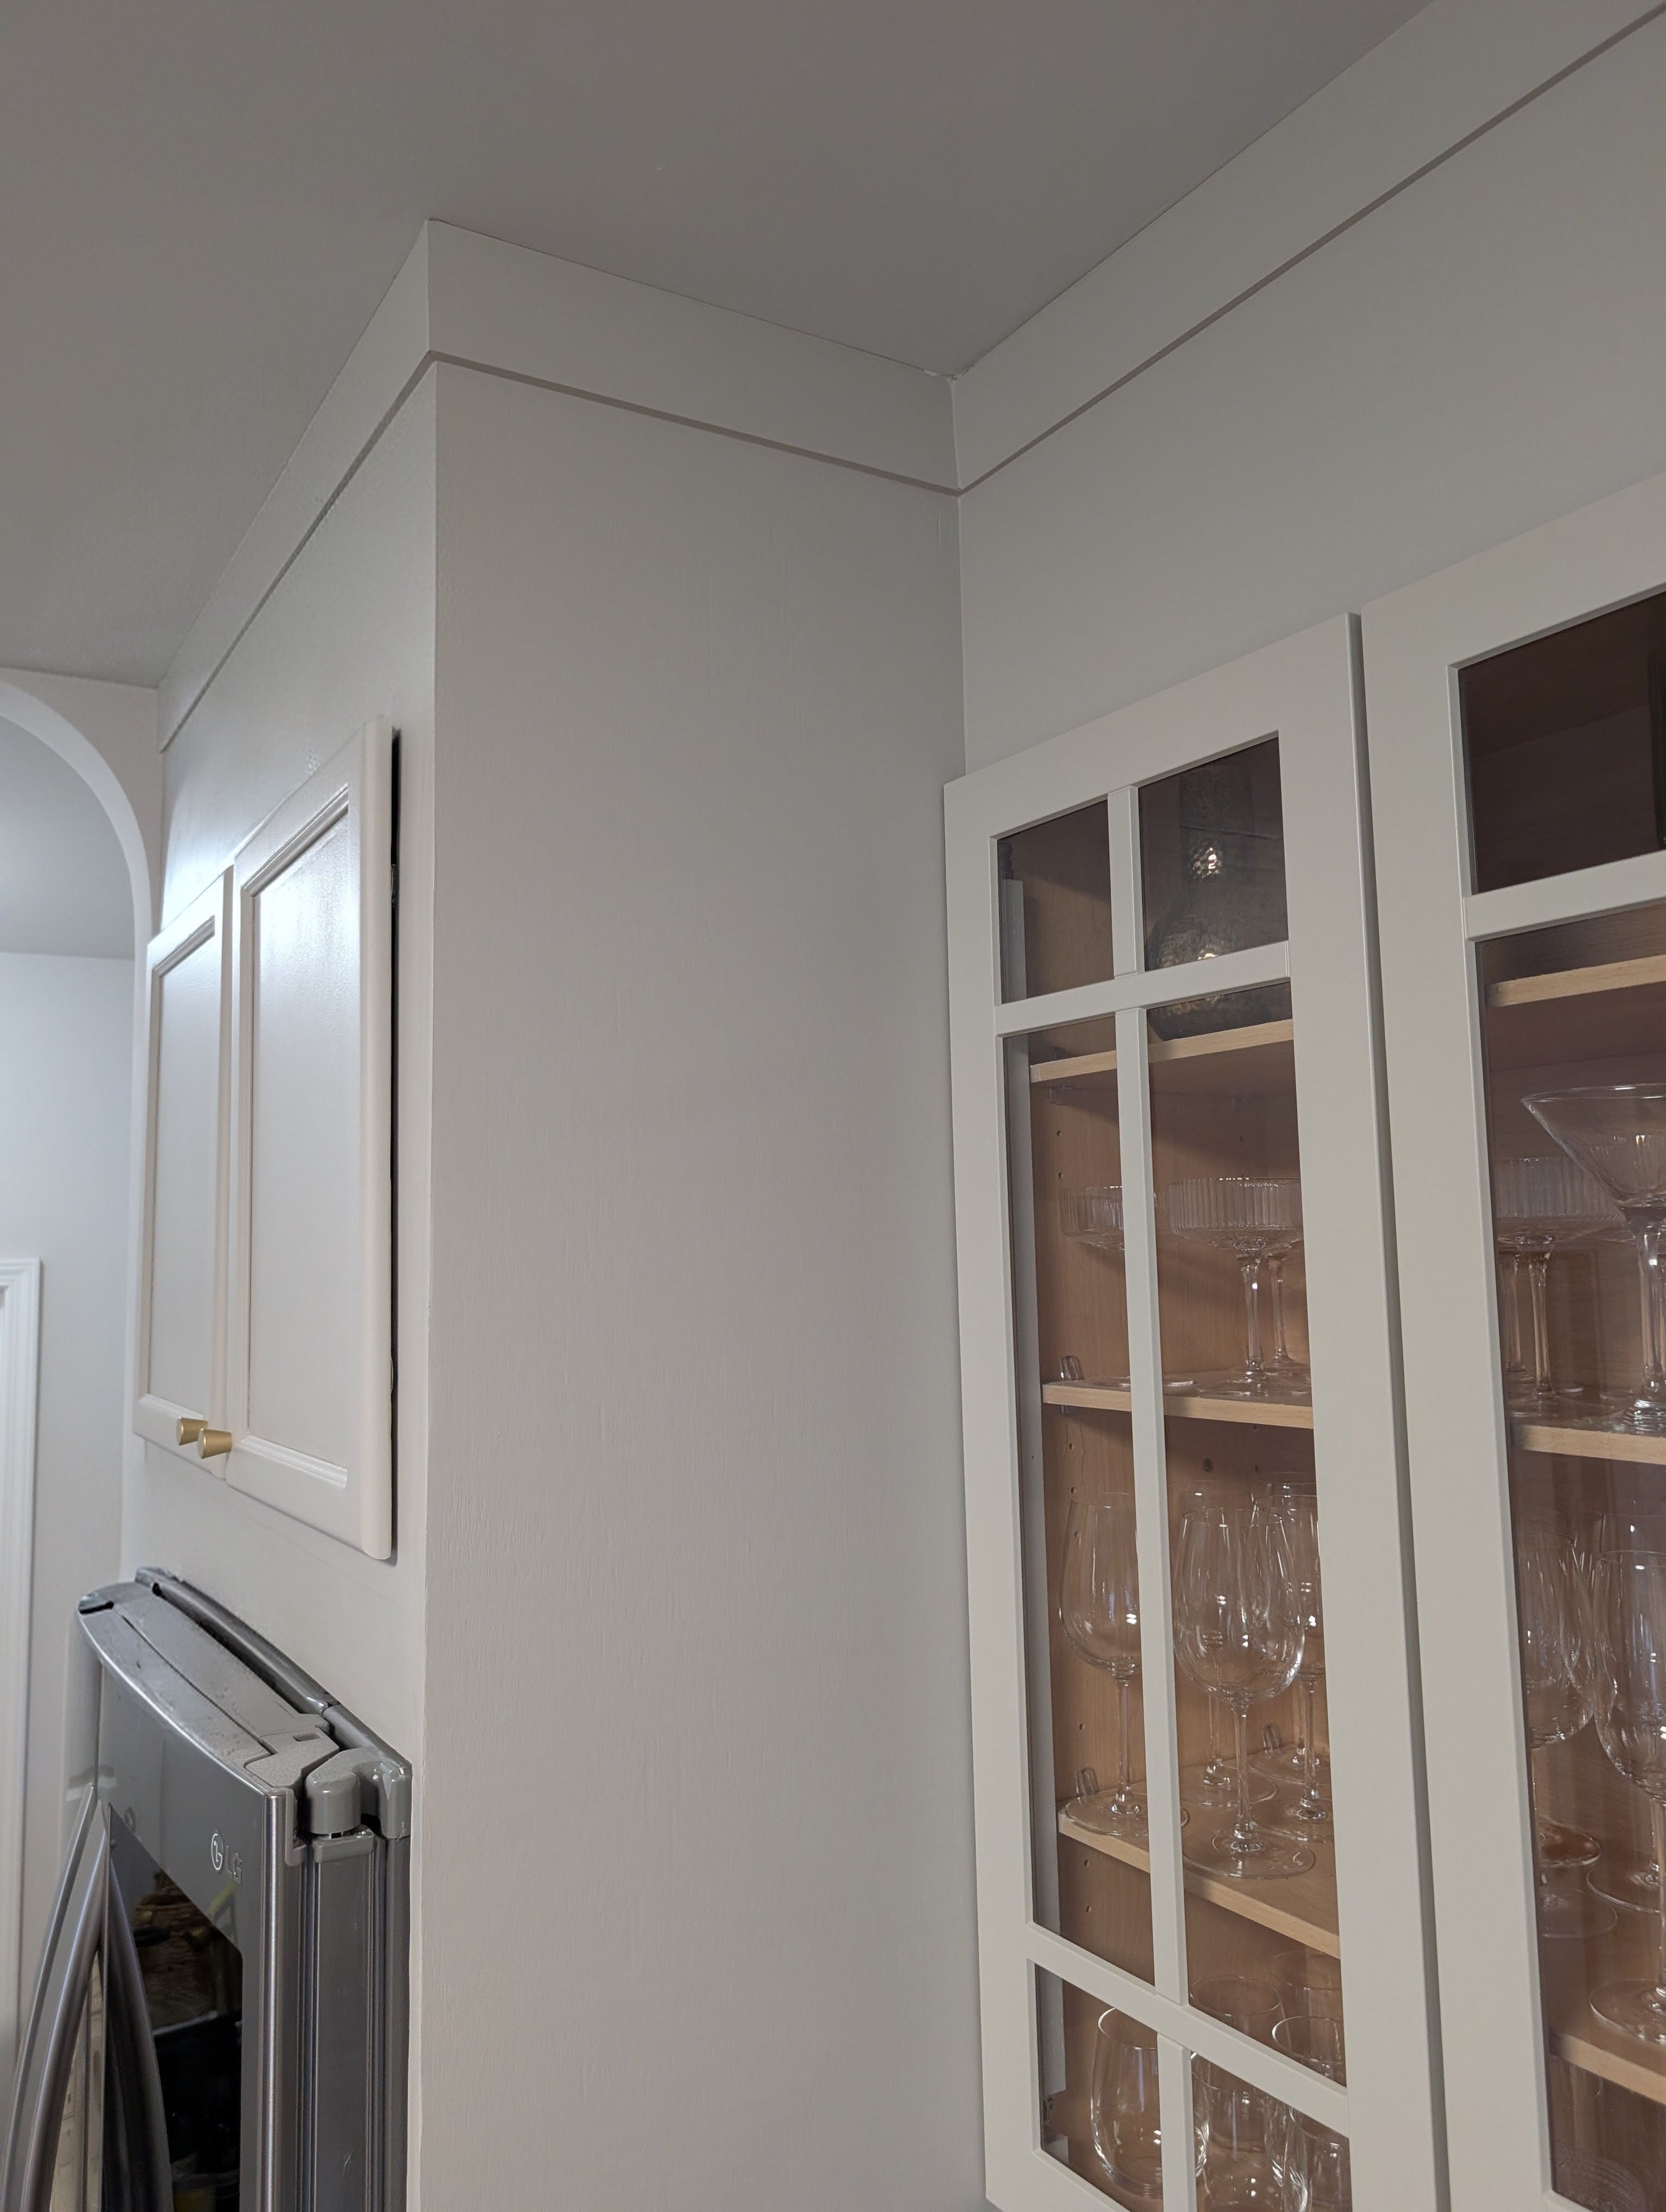
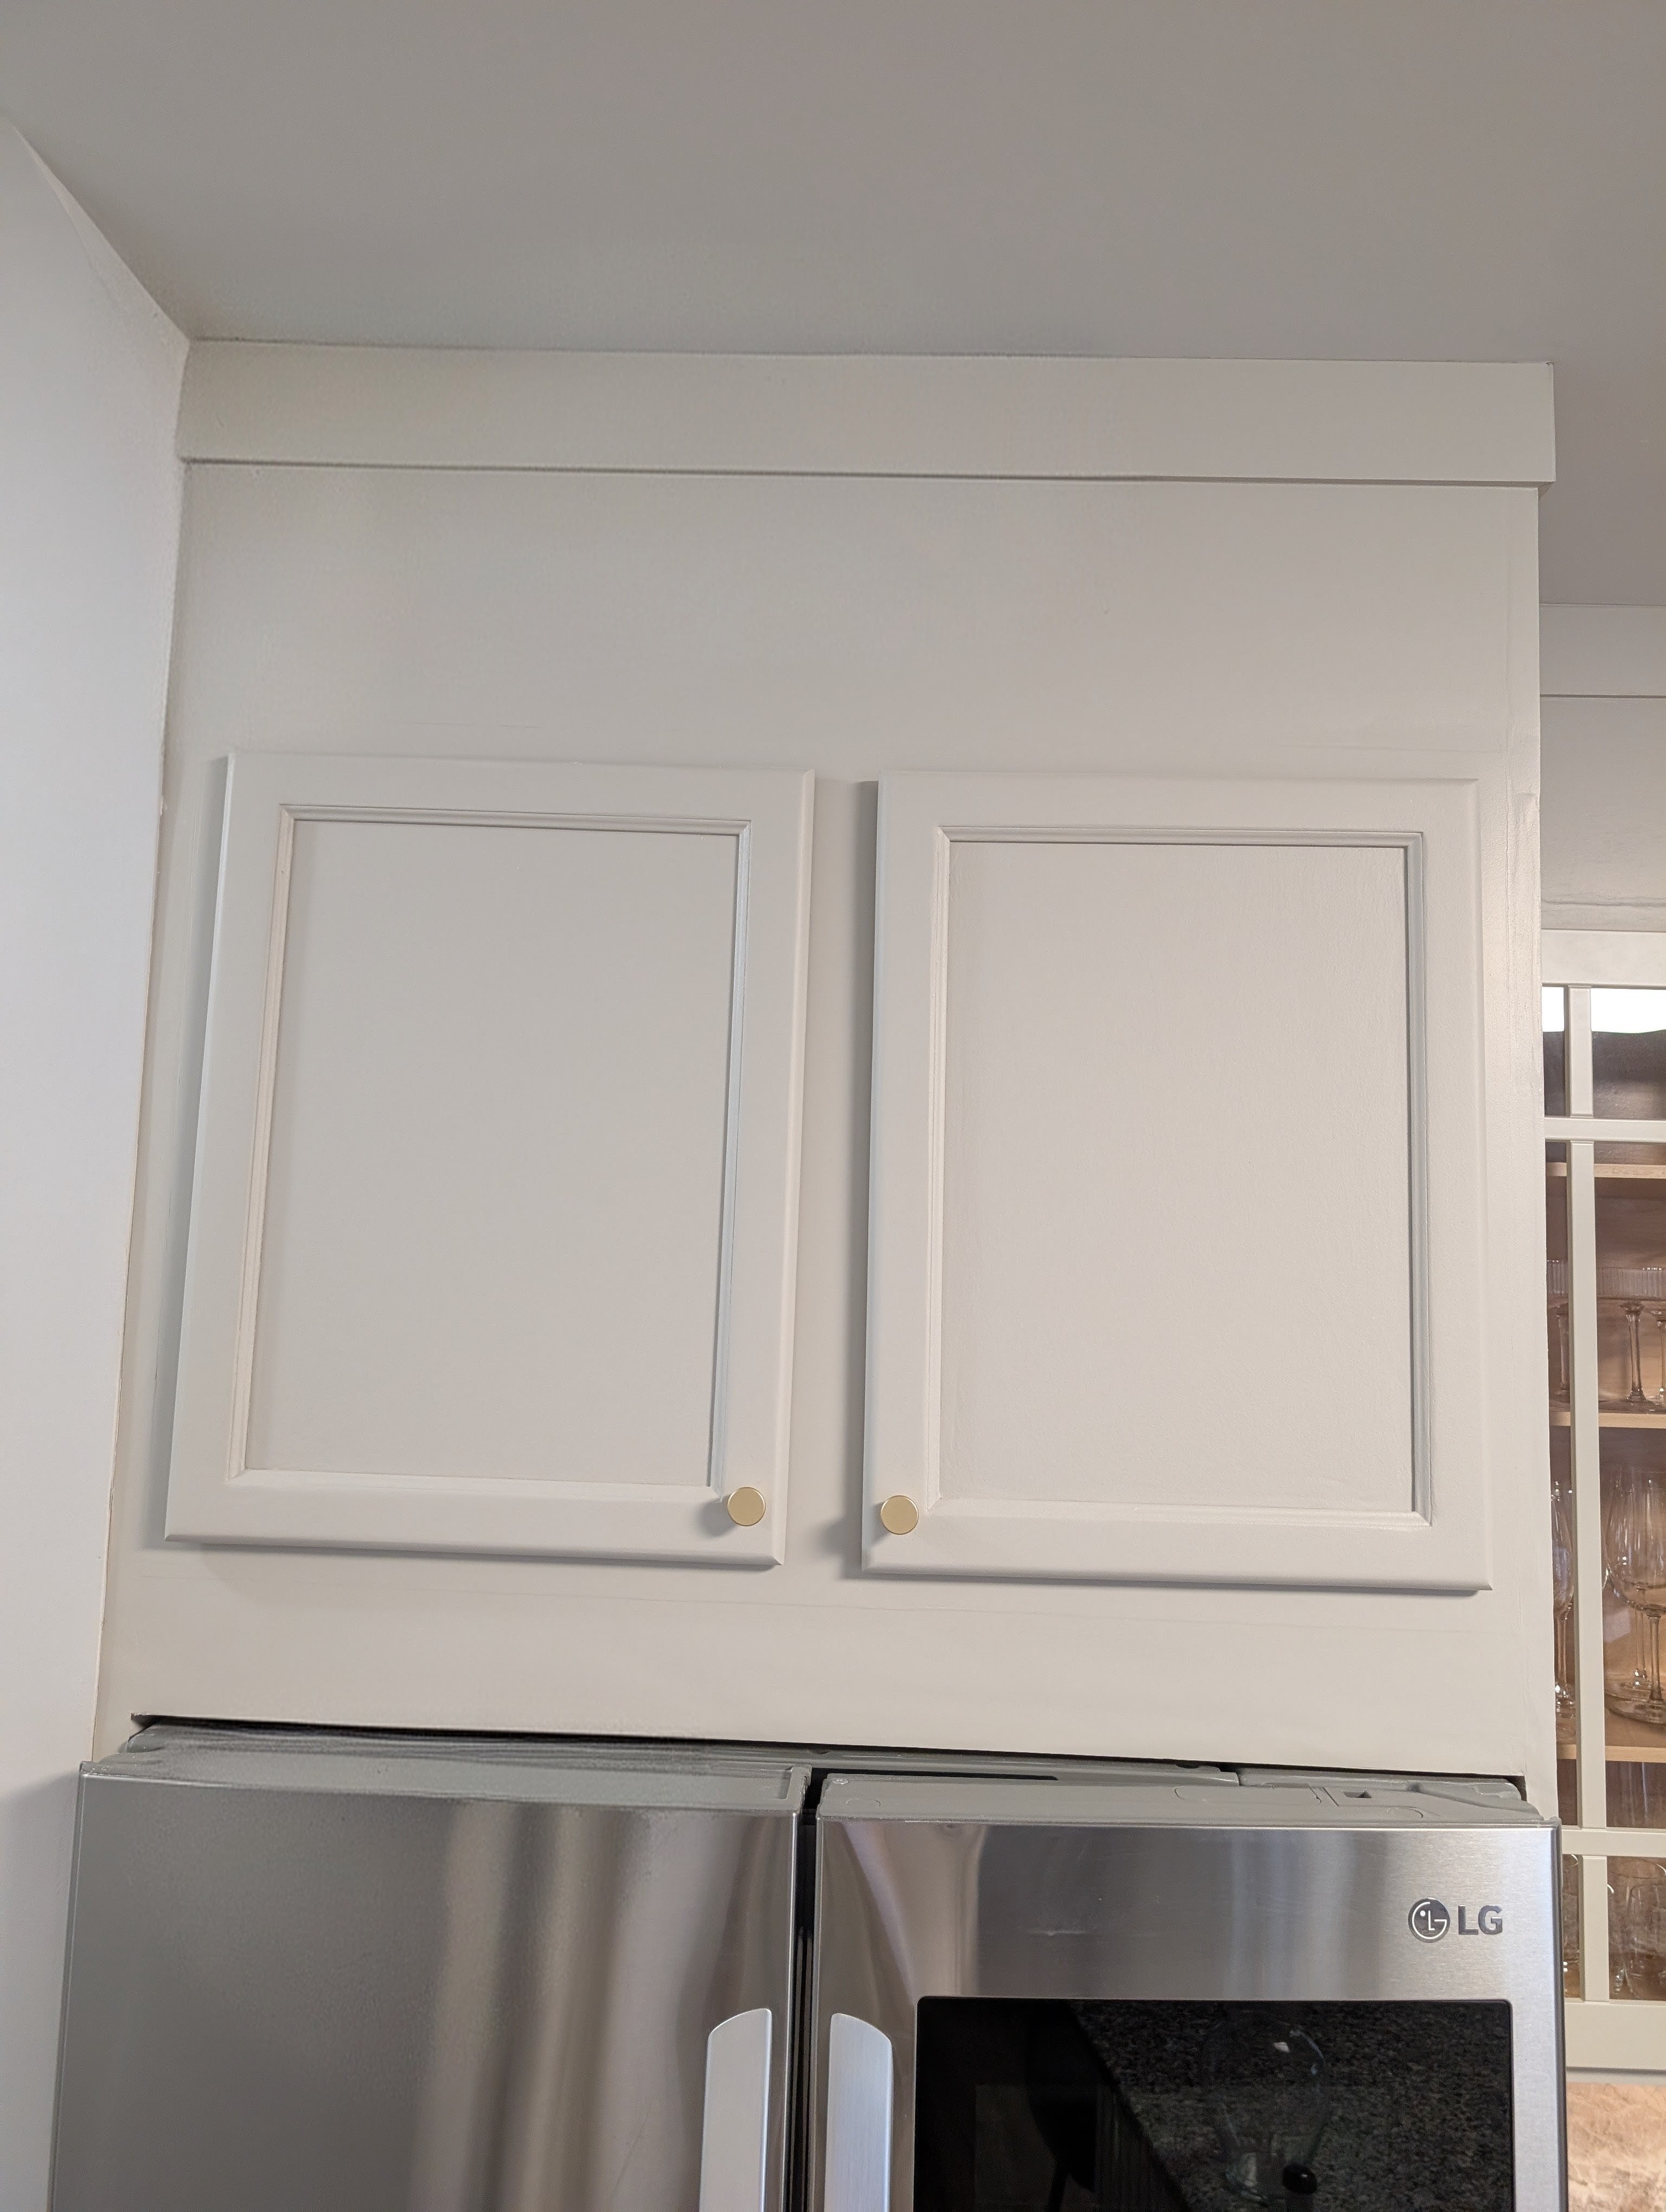
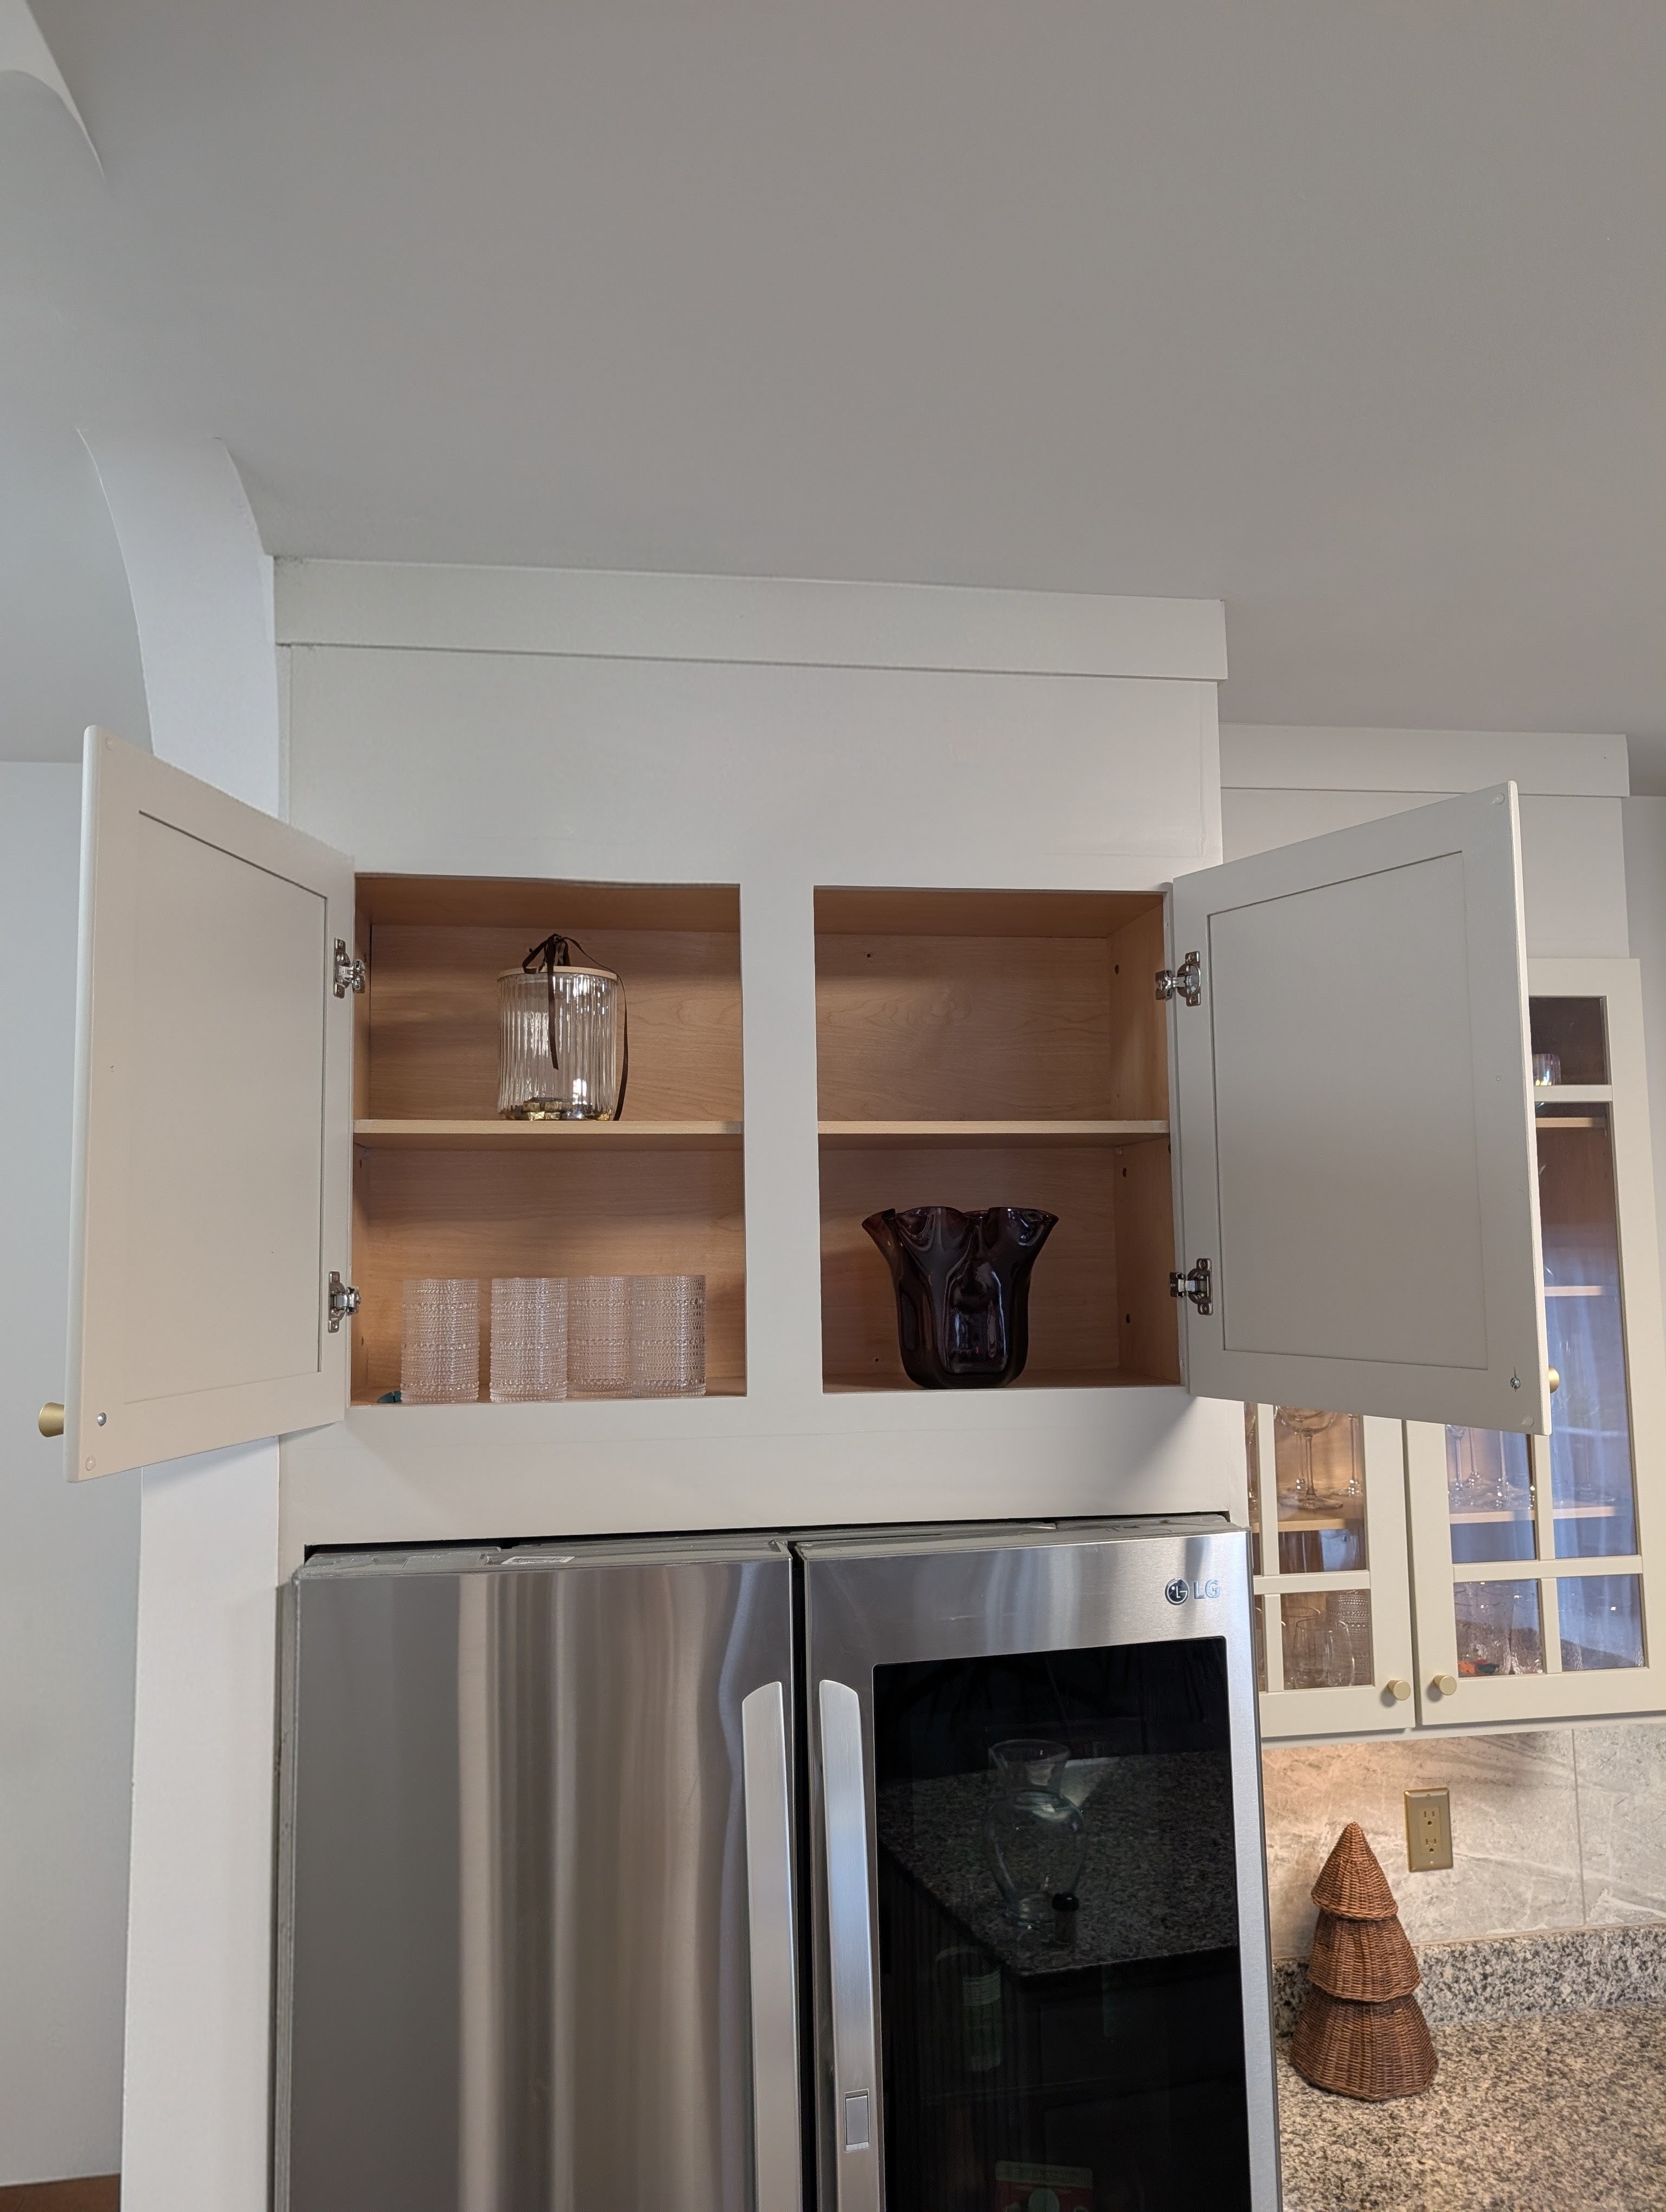
I've always wanted to have that "hidden" look—where the refrigerator blends seamlessly into the cabinetry. So we decided to have no visible gap or "reveal" around the edges. If you want to give a standard appliance a high-end, integrated look then "Casing" or "boxing in" a fridge would be the easiest way. Our fridge has a glass door but if yours dont, you might even attach a custom cabinet panel on top of the fridge doors, and the fridge would look exactly like a tall pantry cupboard.
The Before and the Process
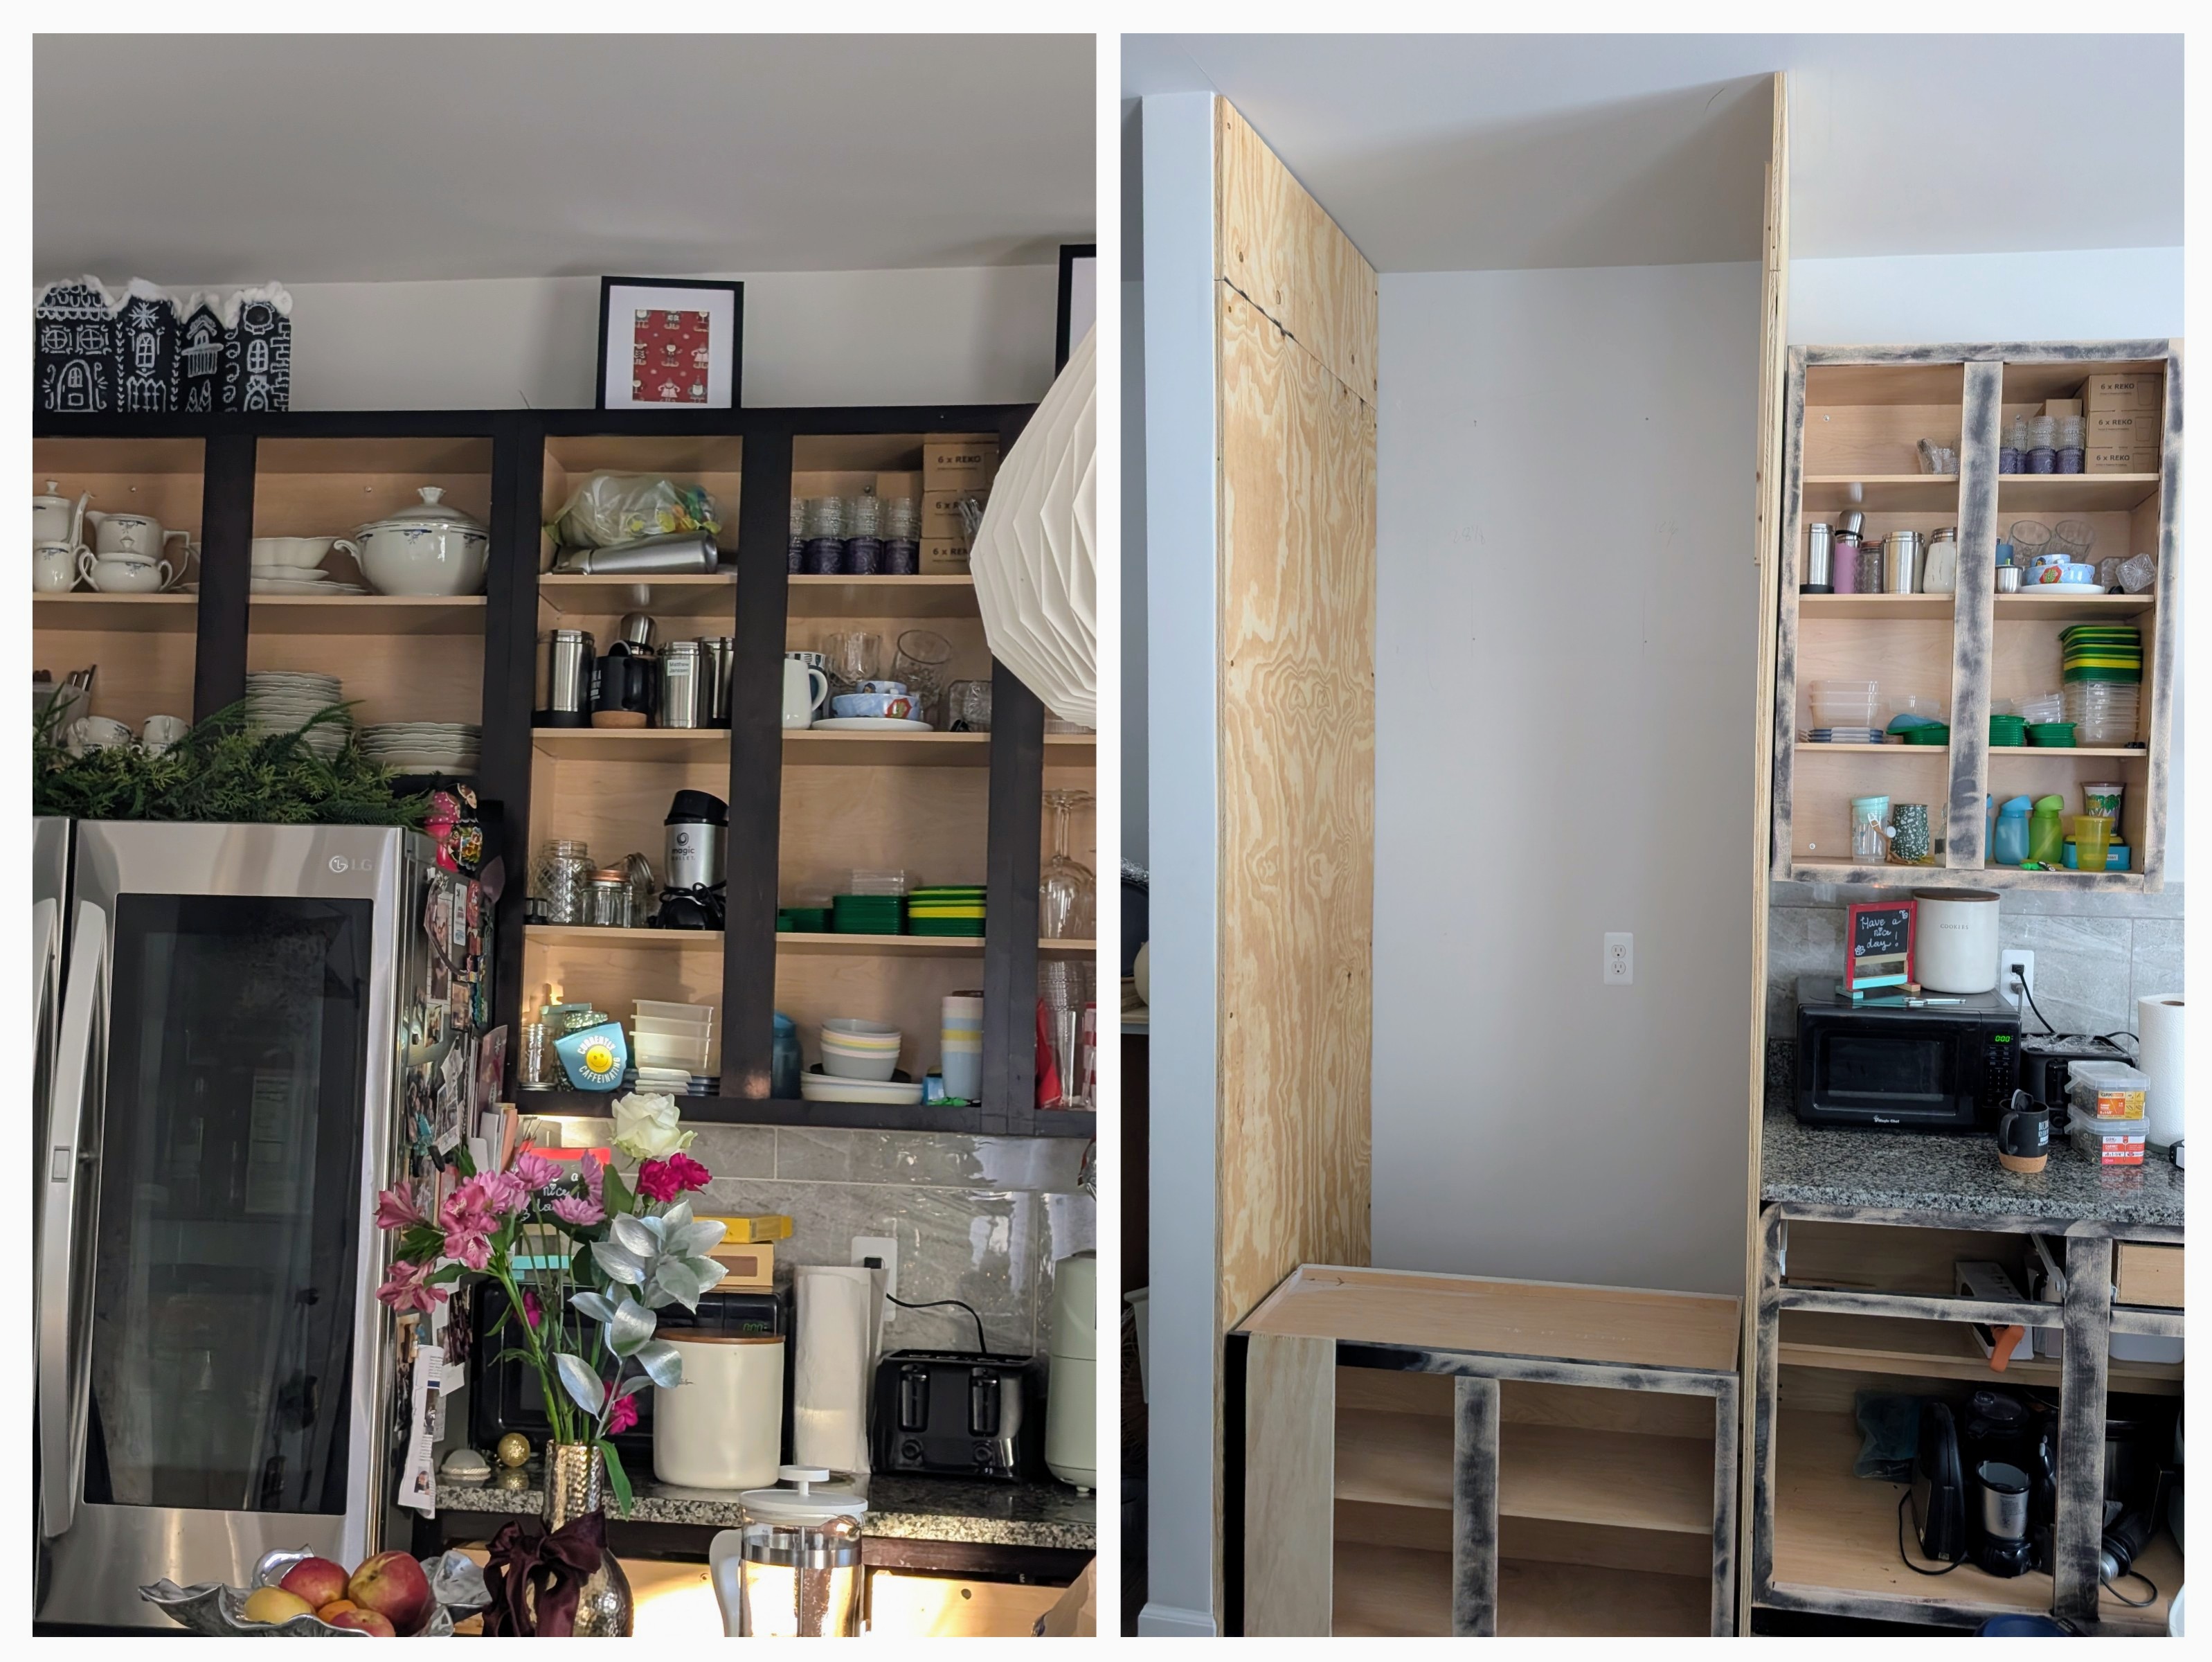
If you are looking into adding casing to your fridge here are 4 key technical details to consider for a successful build
1. The "Breathing" Room
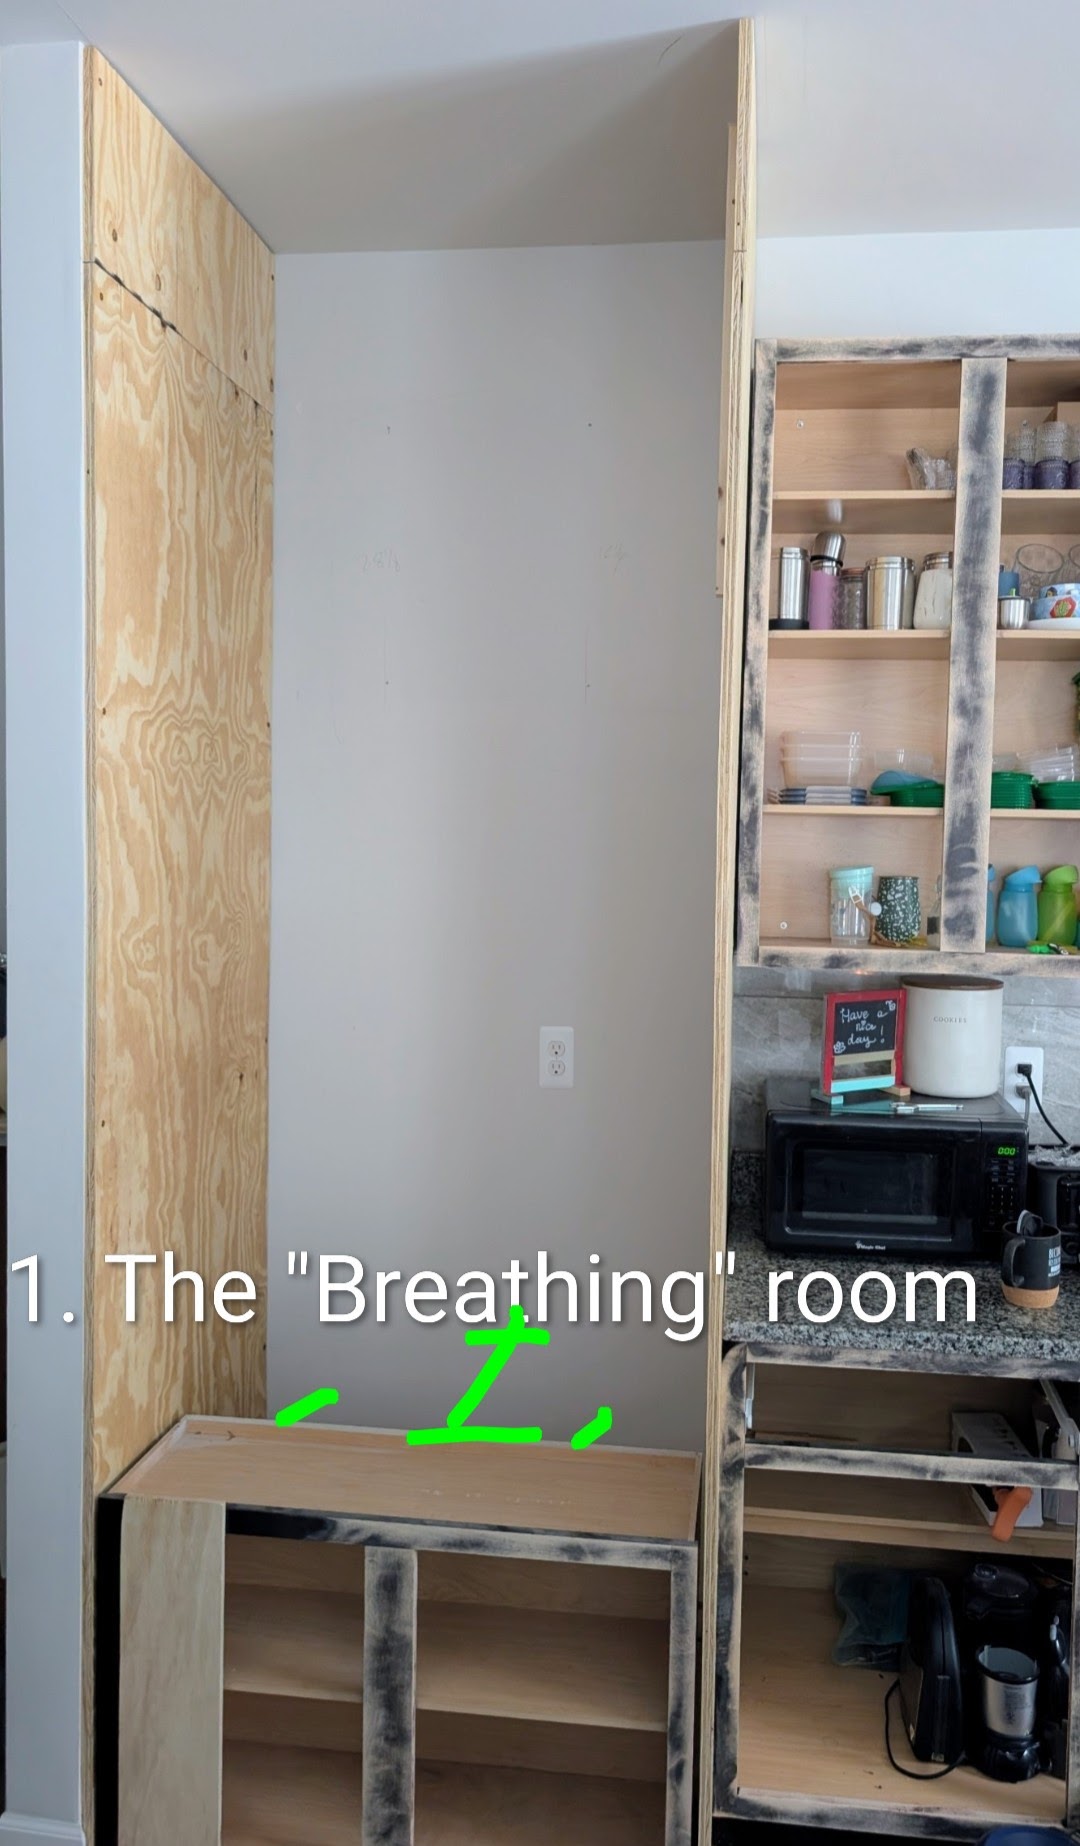
The most common mistake is building the case too tight. Fridges generate heat as they cool, and that heat needs to escape somewhere. So aim for at least 1/2 inch to 1 inch for the side clearance on each side and ensure there is a 2-inch gap between the back of the fridge and the wall to allow the condenser coils to function.
2. Hinge Clearance and Swing Path (90 degrees rule)
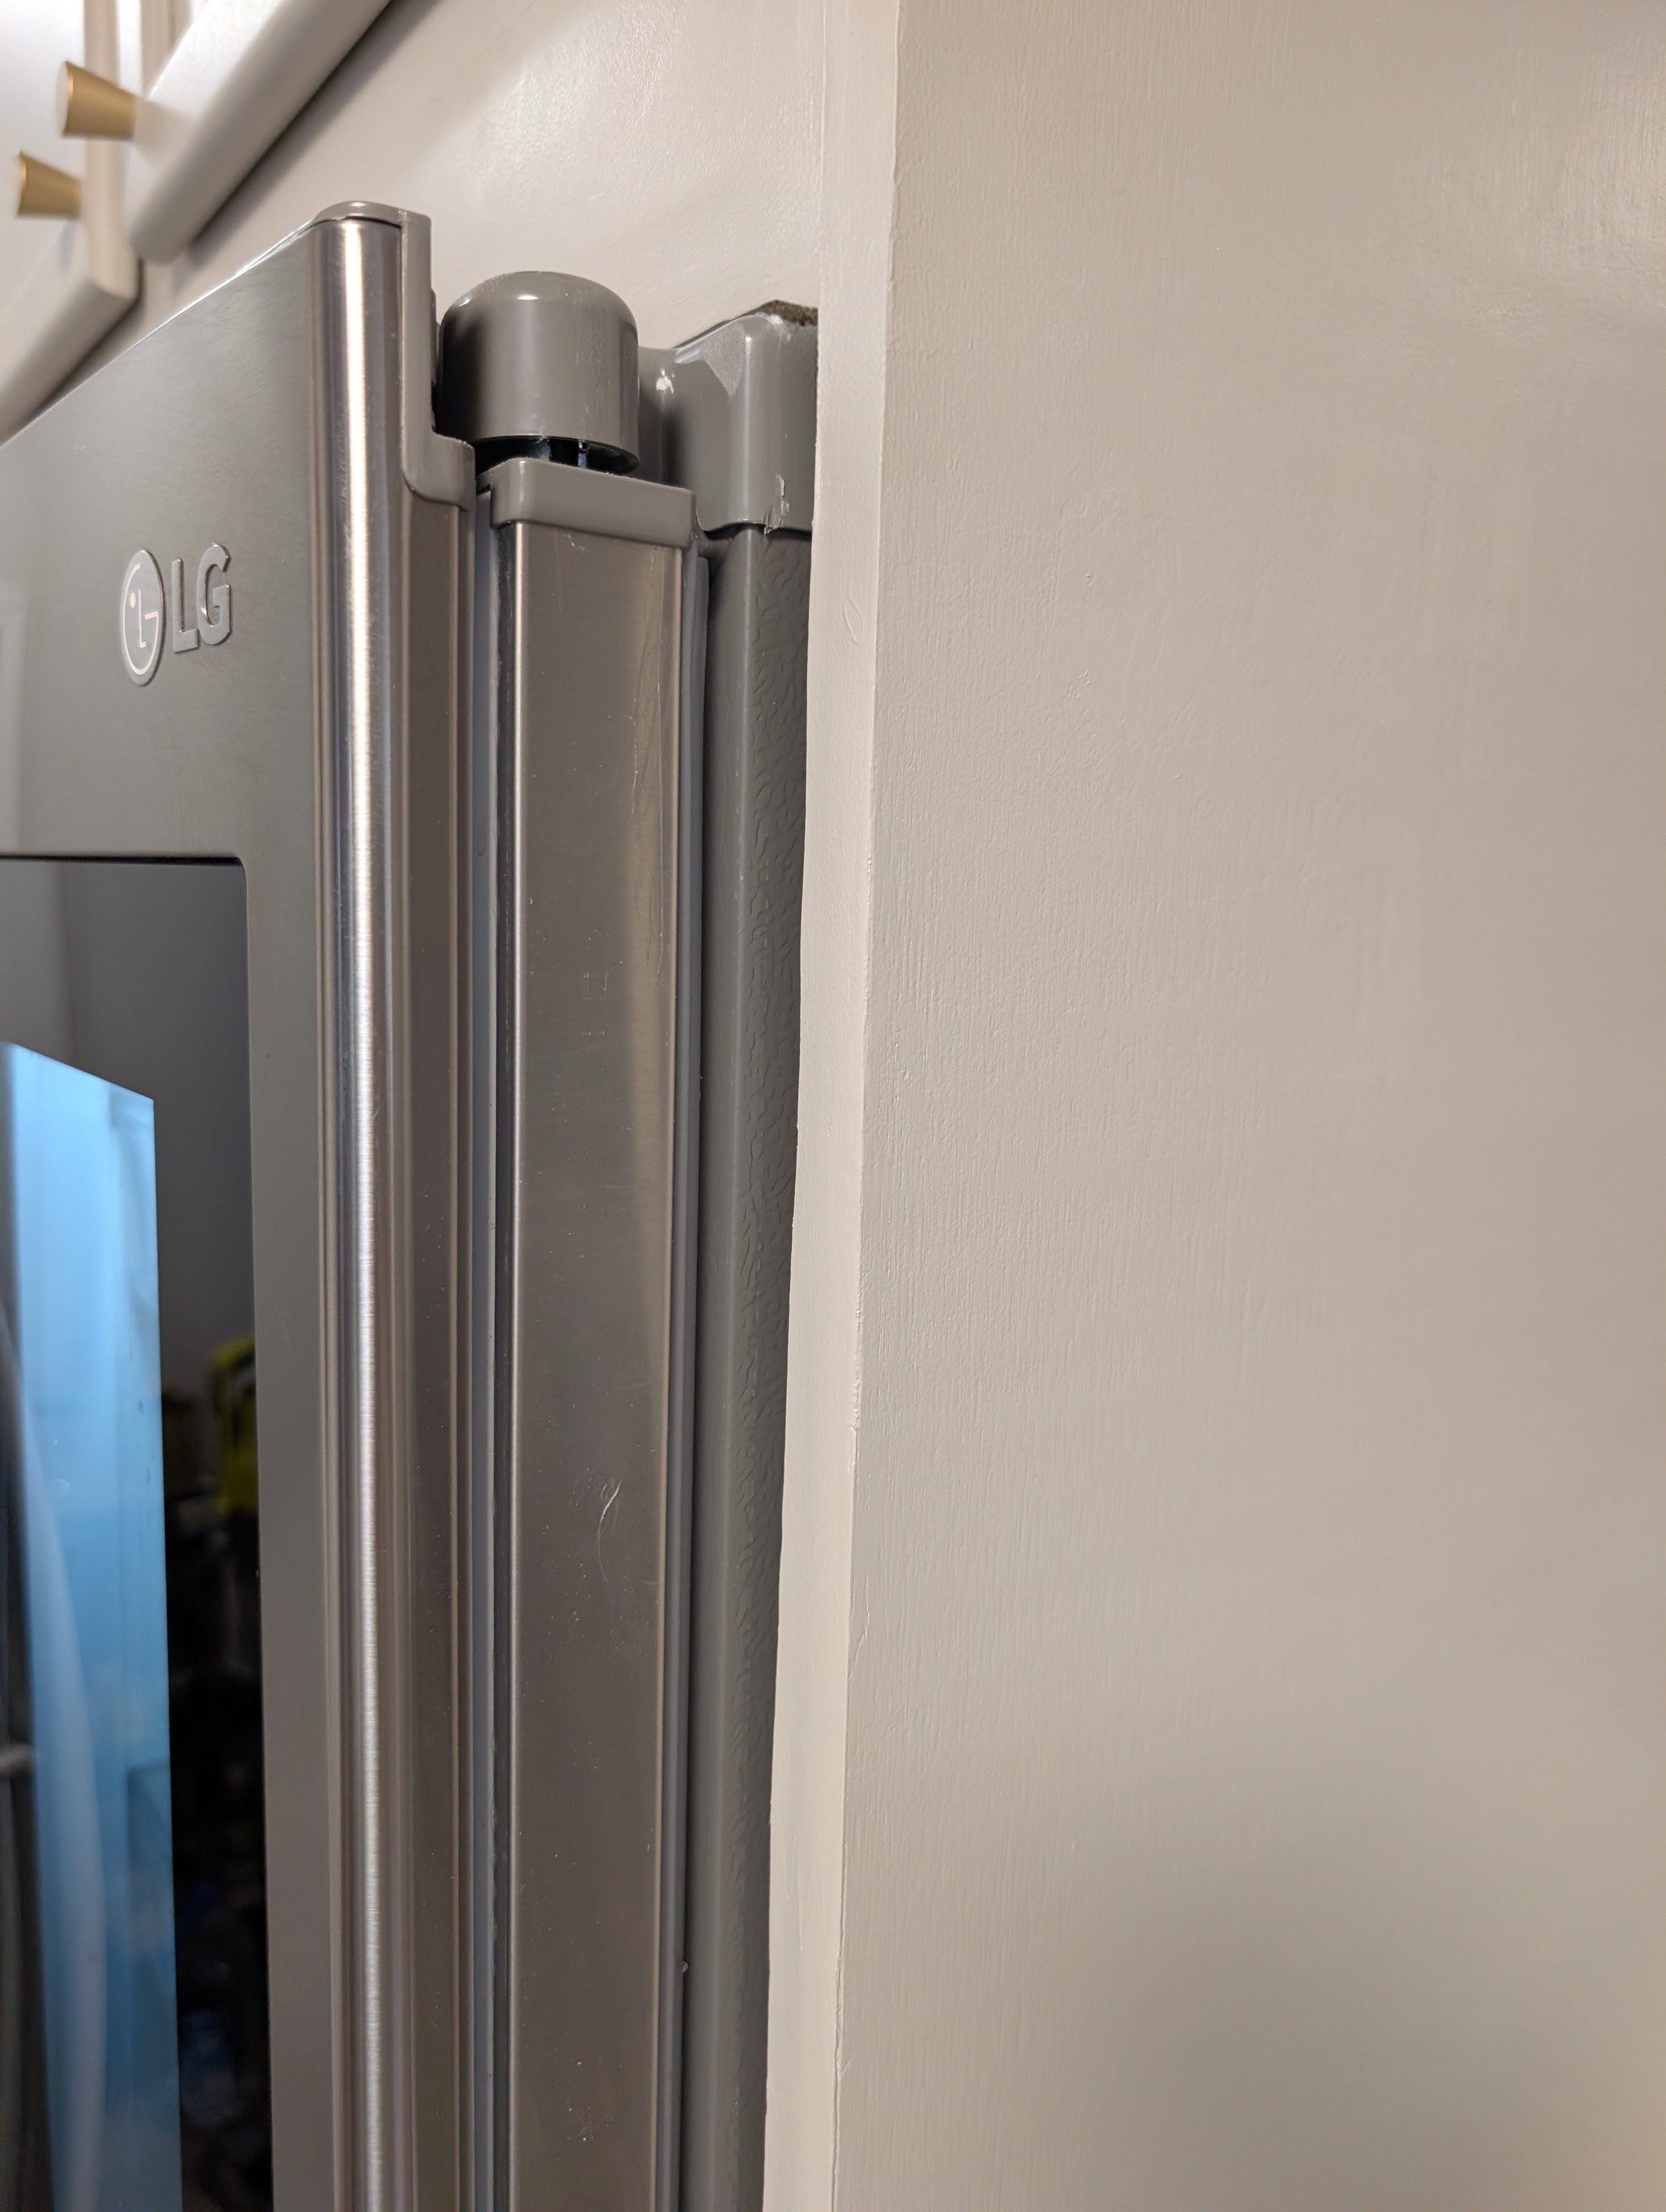
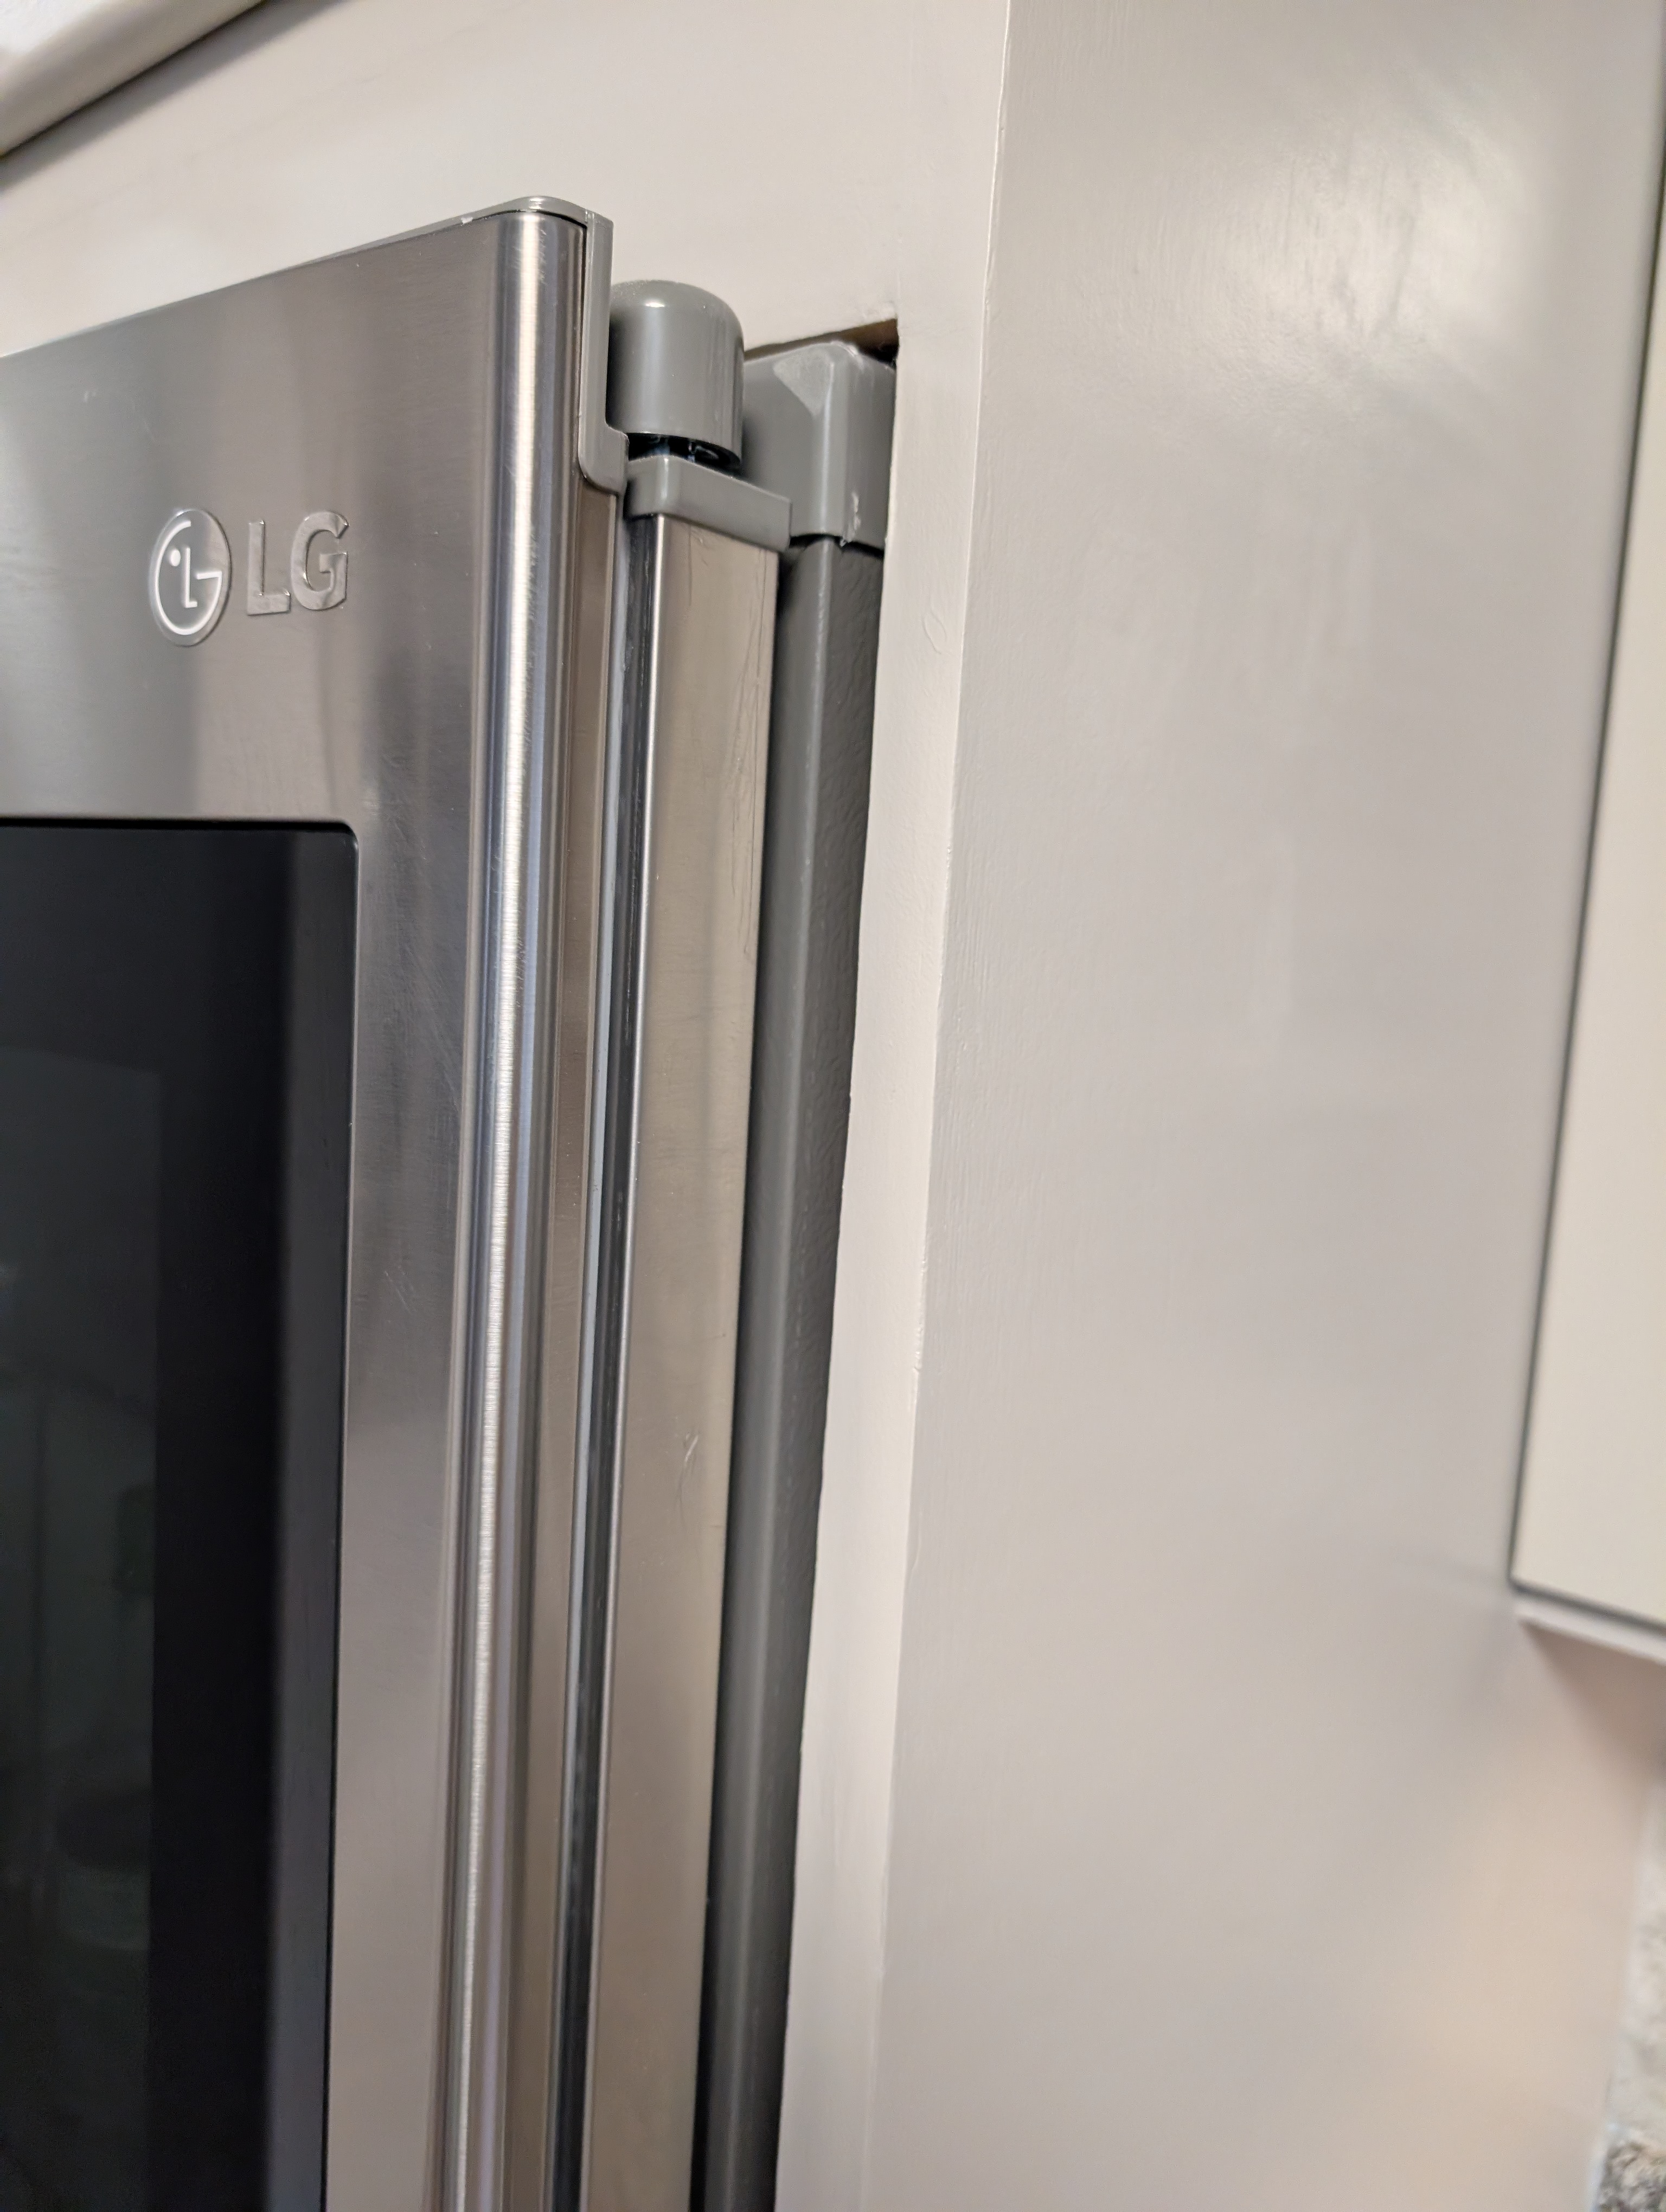
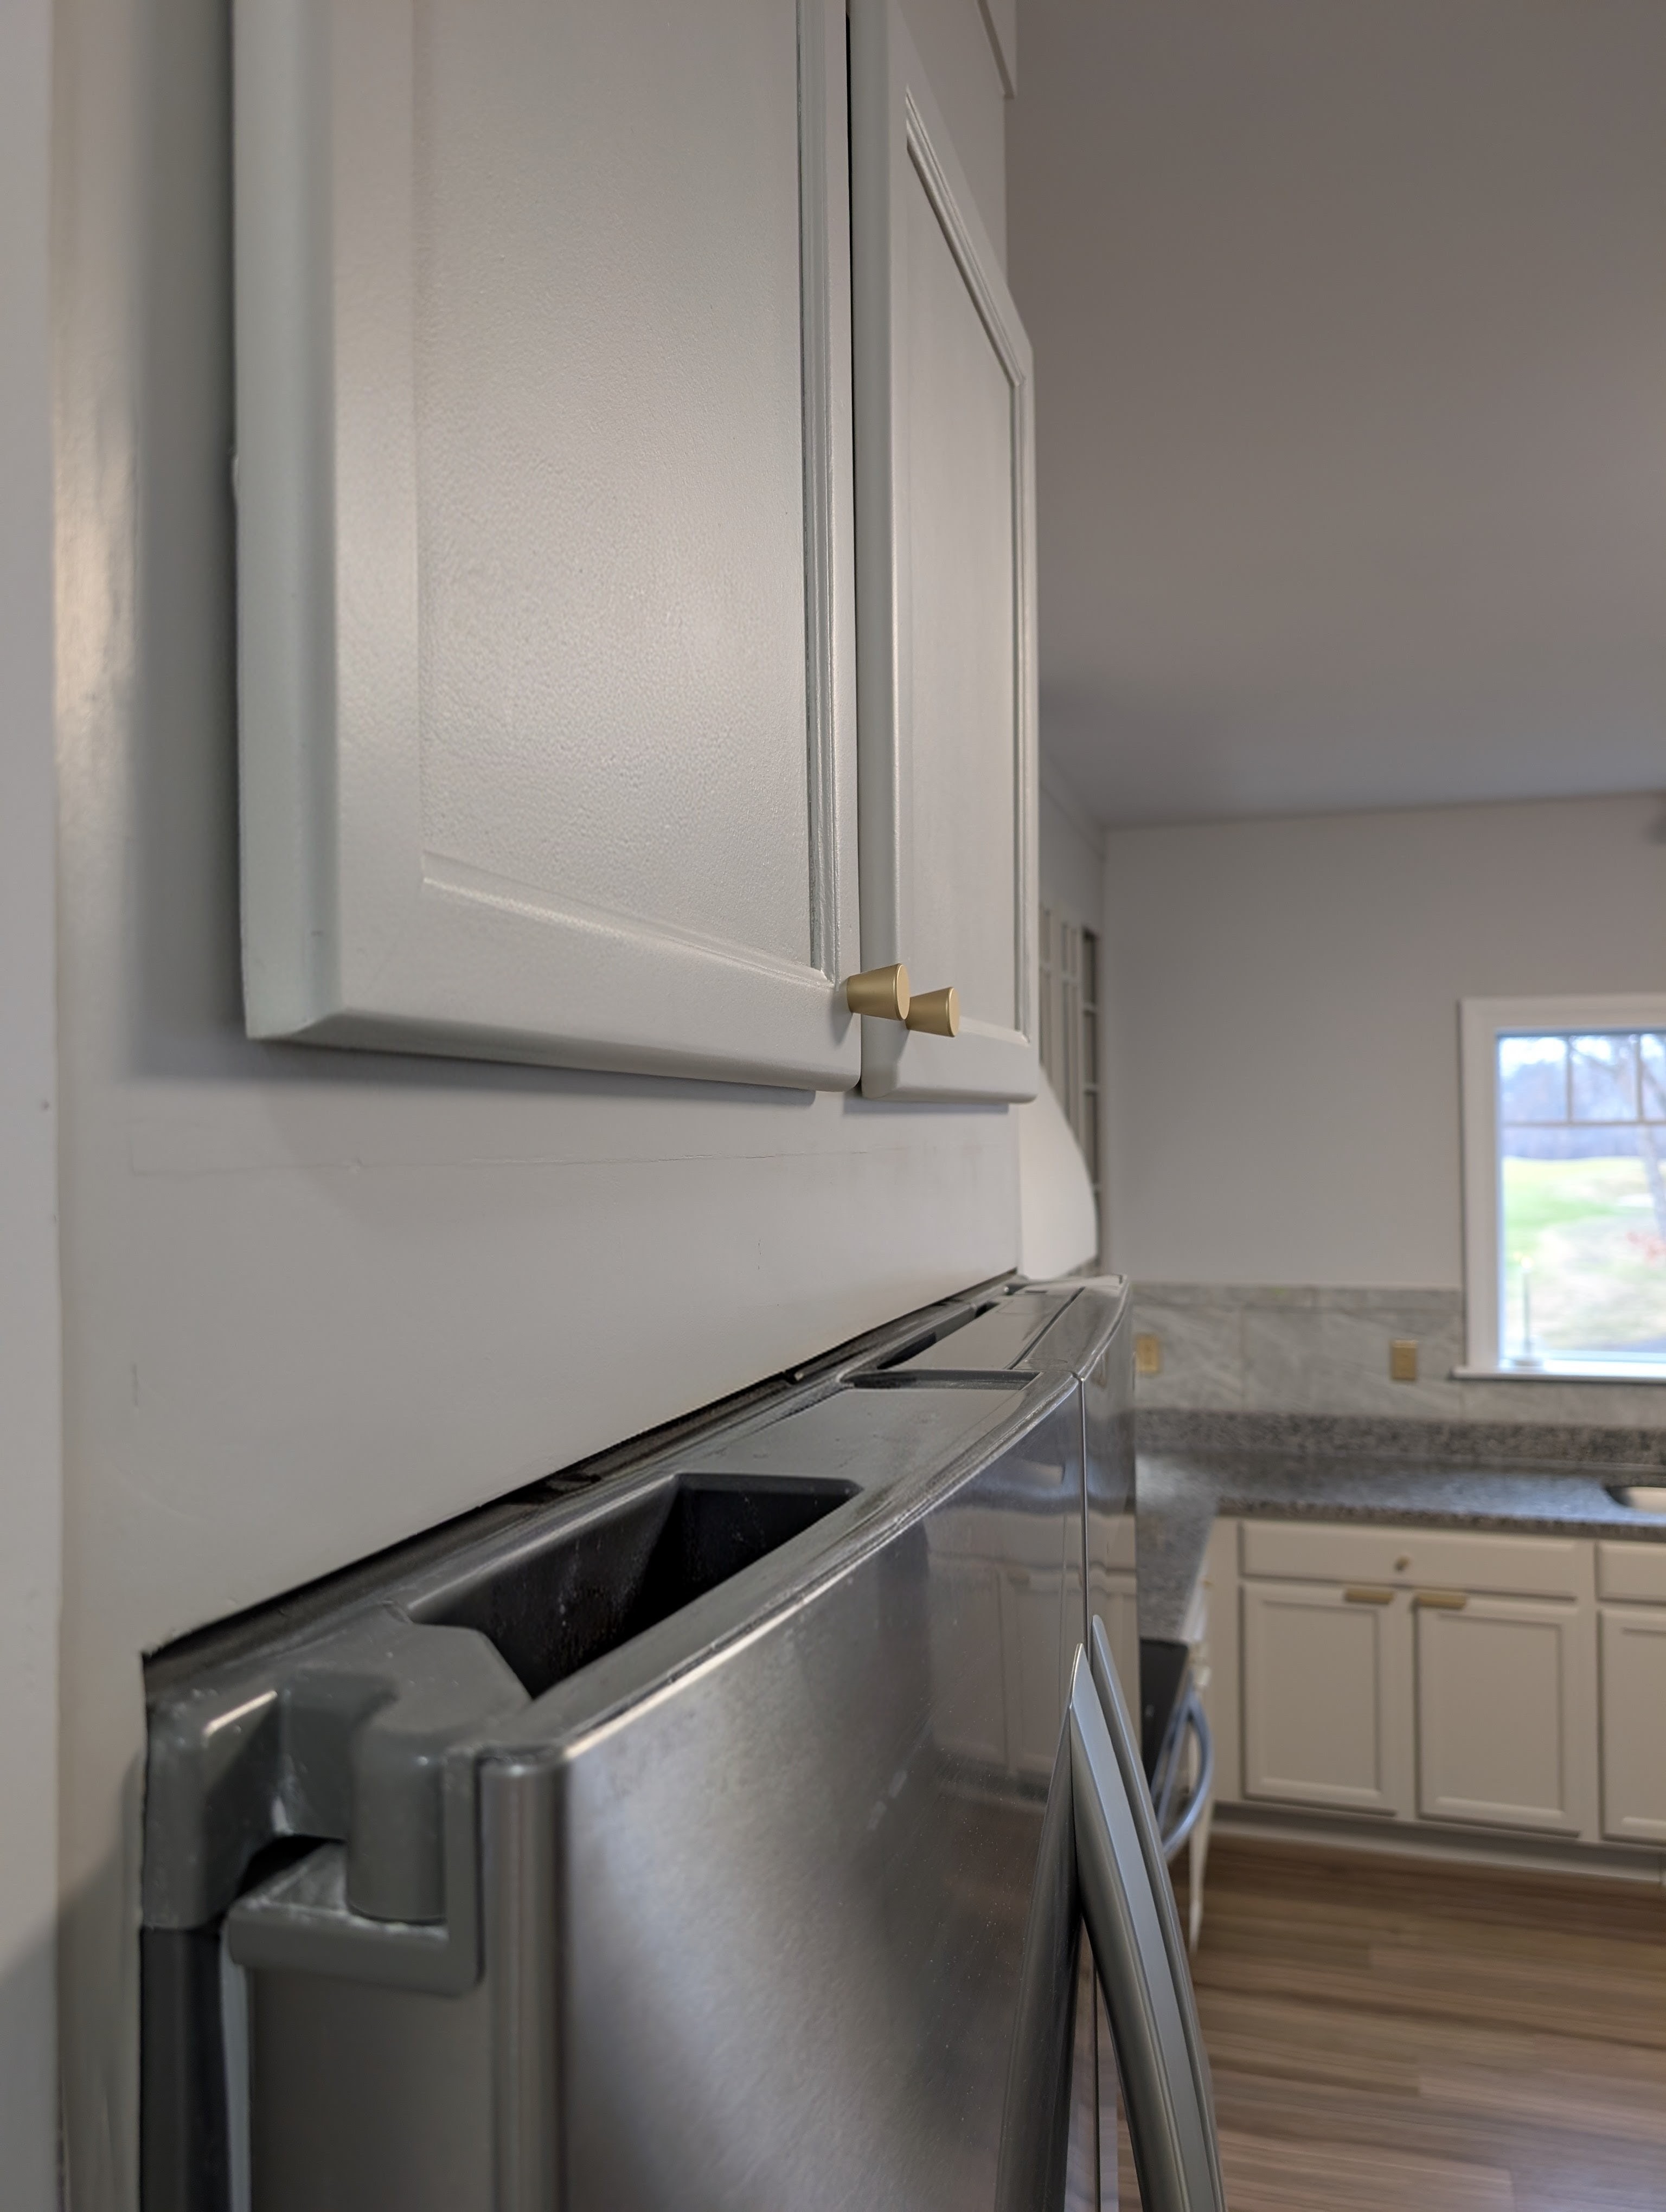
Standard fridges are not "flush-mount" like true built-ins and most fridge doors need to swing open wider than the fridge body itself. So if the wooden walls come out past the front of the fridge box, the doors will hit the wood when you try to open them. The solutions would be to measure the thickness of your fridge doors and make sure the wooden casing stops just behind the hinge line.
3. Material Choice
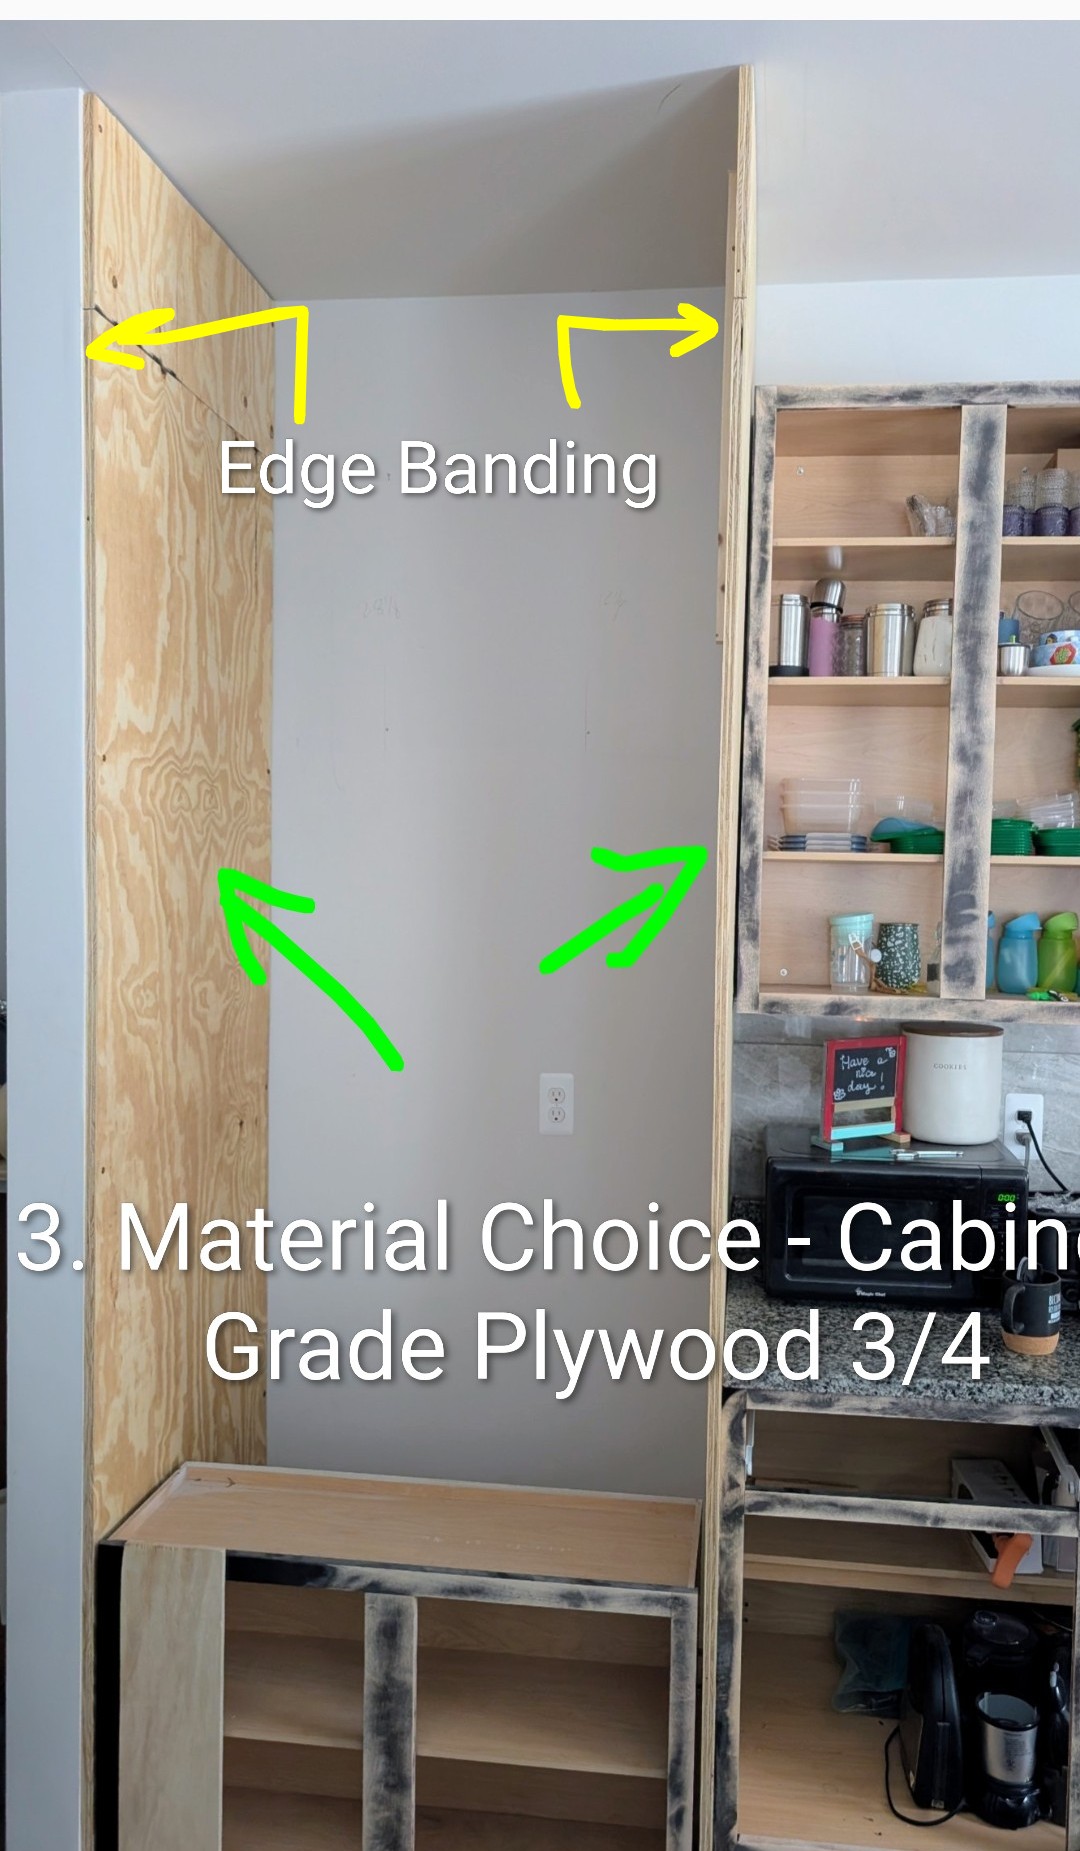
Since you are building "walls," you’ll want materials that won't warp from the heat or the occasional kitchen humidity.
Cabinet-Grade Plywood: (3/4 inch) is the gold standard. It’s stable and takes paint or stain beautifully but still requires a bit of sanding. For our 10ft ceiling we had to join 2ft and 8ft pieces.
Edge Banding: We used iron-on wood veneer edge banding to hide the "layers" of the plywood on the front-facing edges.
4. ..and finally, Anchoring and Stability
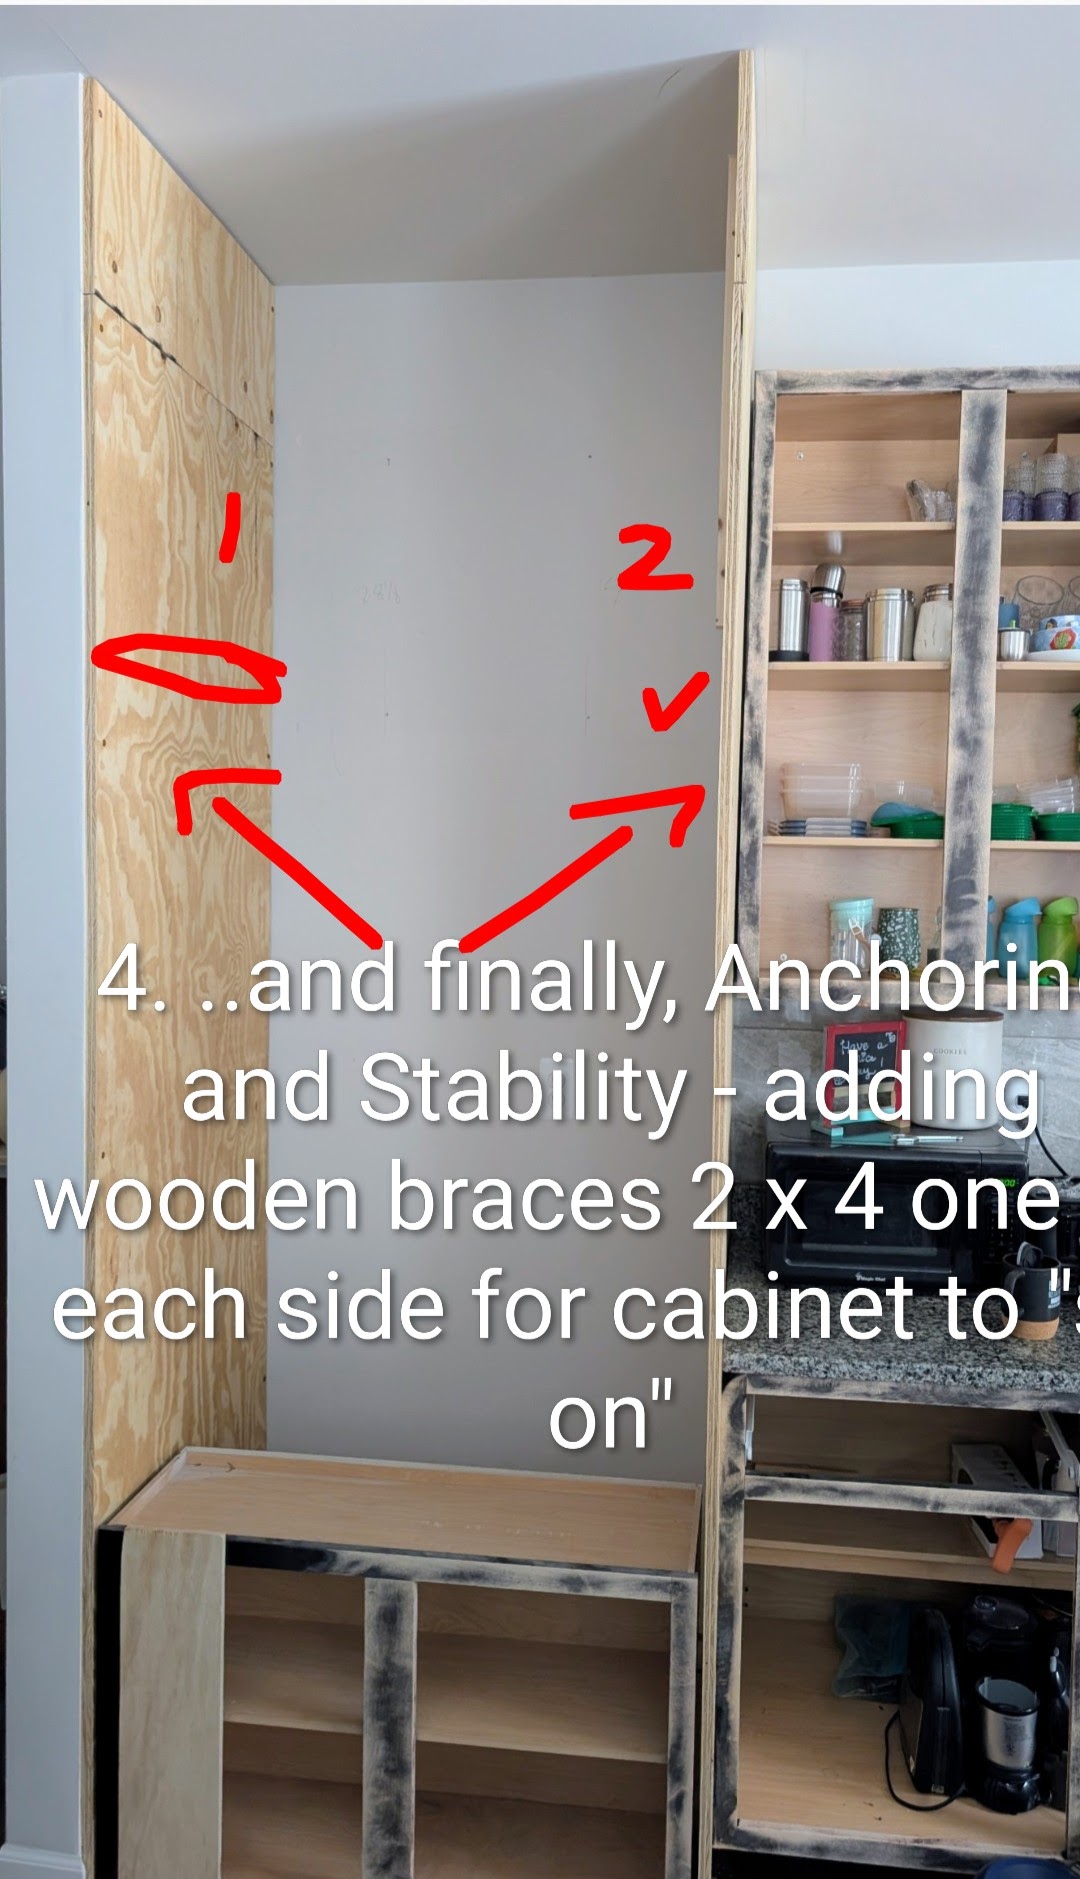
We used the cabinet that was above the fridge to connect the two side wooden walls. Don't just rely on the side panels as they are not sturdy enough so we added wooden braces 2 x 4 one on each side for the cabinet to "sit on". This provided structural integrity and extra storage for items we don't use often.
Material Sources:
Paint: Revere Pewter (HC-172) by Benjamin Moore, Wood: Cabinet grade plywood 3/4, Iron-on veneer edging, sanding machine, 2 x 4 studs , gold knobs brushed brass cabinet knobs
Tools we used: sanding pads (please select the following : we used 60 grit was used for stripping the paint of the cabinets, 120 grit for first sanding and 220 grit for final sanding), circular saw, plate jointer, cordless drill
Which specific shade did you end up going with? Have you tried this technique before? Leave a comment and let me know how it went at [email protected]